Guidelines for branding and designing successful IFTTT services
The IFTTT Platform enables you to integrate with over 900 of the world's best apps and devices, such as Twitter, Dropbox, Evernote, Fitbit, Amazon Alexa, and Google Assistant. On IFTTT, we call these product integrations "services." Turning your product into an IFTTT service will allow you to connect any of these services together into Applets, custom automation workflows that allow millions of users to do things your apps and devices can't do on their own.
In this guide, we will provide you with all our tips, tricks, and best practices for building and designing successful IFTTT services, including:
- How to design successful Triggers
- How to design successful Authentication
- How to design successful Actions
- How to design successful Queries
- How to design successful Applets
- How to brand your IFTTT Service
How to design successful services on IFTTT
Understanding the ideal use cases that benefit your users the most will be the key to designing your service and delivering the triggers, queries, and actions that they expect.
Authentication
User trust is core to the IFTTT experience, and authentication provides users with the assurance that their services and devices will talk to each other in a secure and reliable way.
Most services on IFTTT require user authentication. Authentication connects a user's account for your service to IFTTT so that their Applets can be personalized with their own user-specific information.
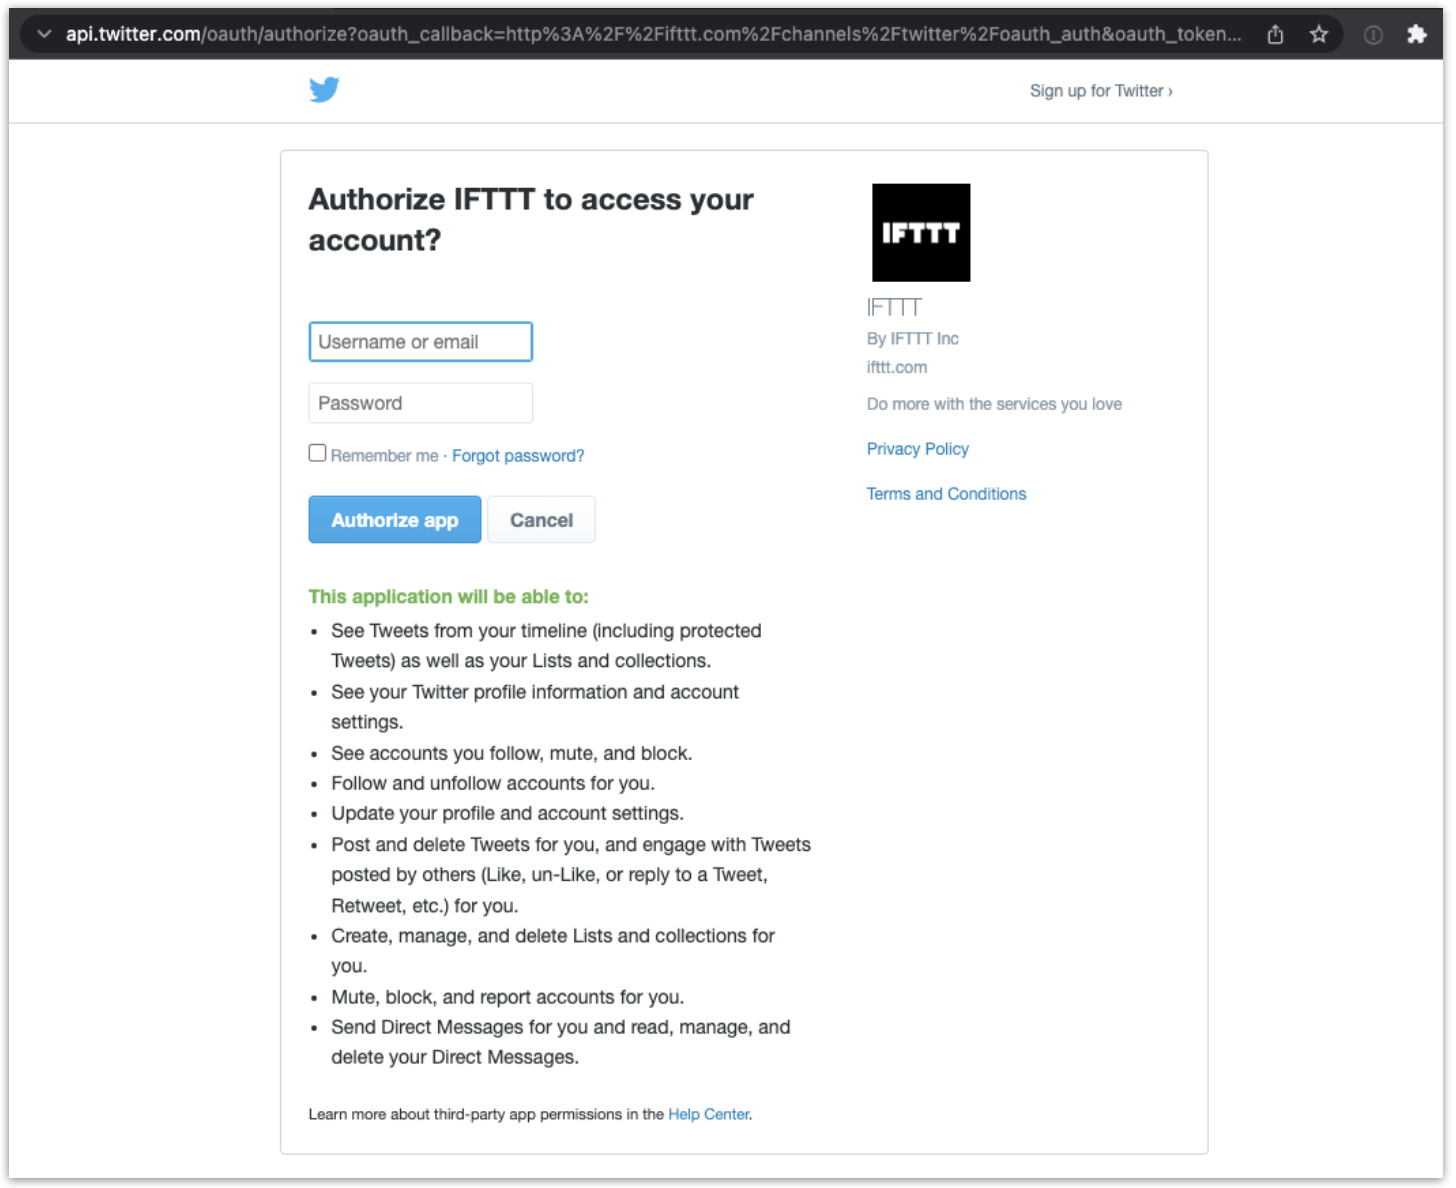
Any service that manages user-specific data or actions must implement authentication. Alternate forms of identification, such as asking the user to enter their device's serial number, will not be approved.
Services that don't require authentication generally provide publicly available data, such as weather, stock prices, feed-based services, energy prices, or public service announcements.
The authentication flow is initiated when the user connects to your service for the first time. This usually happens when a user enables an Applet, but it can also be done from the service page directly.
IFTTT follows the OAuth2 standard and the technical requirements and details are covered in the Service API section of our documentation. The actual method of authentication is up to you, as long as the flow fits OAuth2 specifications. Password-based authentication and single sign-on providers are the most common strategies, but it's also possible to implement app-based authentication, magic links, and more.
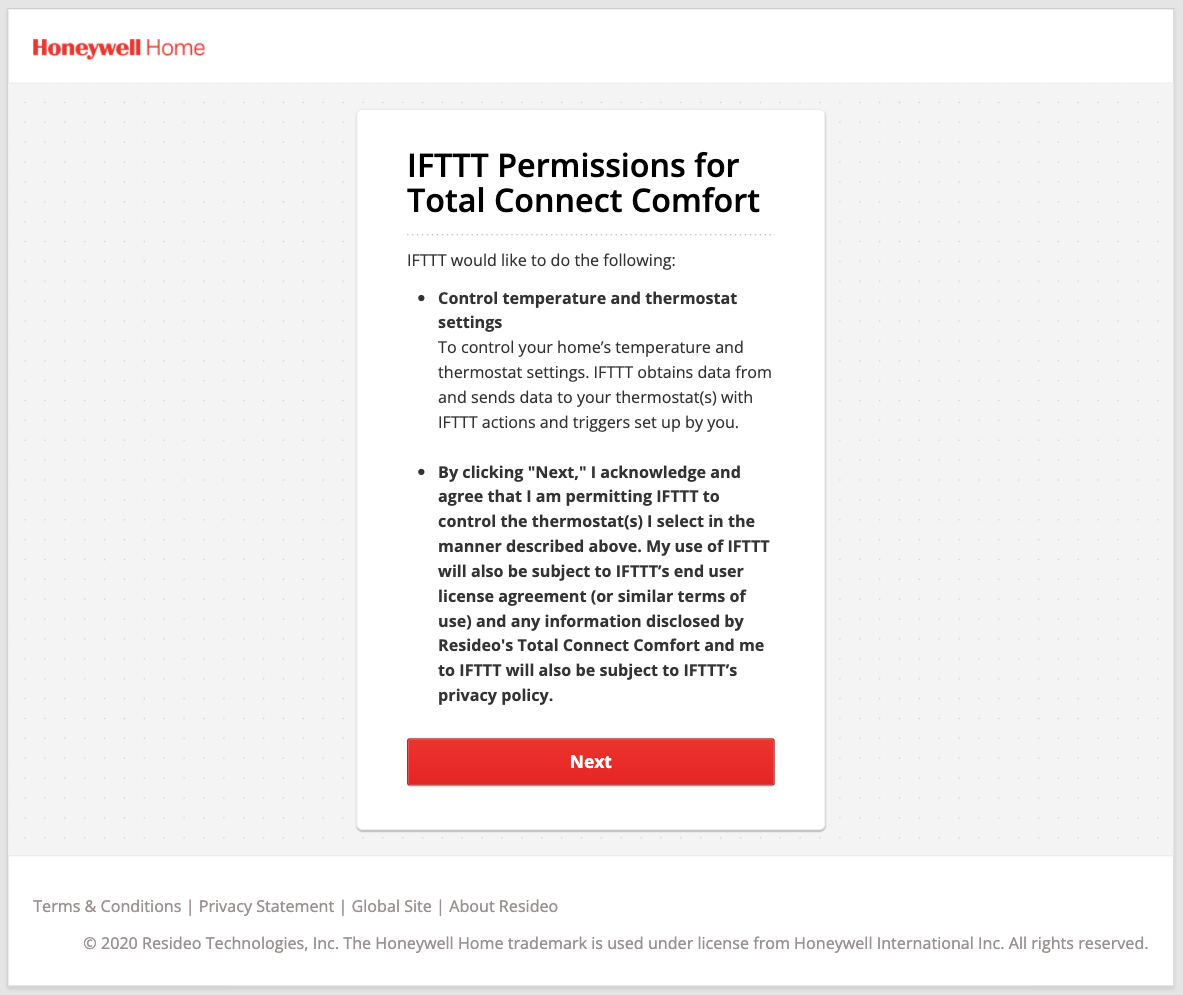
The main requirement for your authentication flow is that you make it clear to the user that they are granting IFTTT some degree of access and control of their accounts with your service. This can be done using a separate consent screen inside your authentication flow or a message on your login page itself. Make sure that it clearly outlines the scope of information exchanged and explicitly mentions IFTTT.
In addition to custom-built solutions, we have seen many services rely on cloud identity providers to handle the OAuth2 flow, including Auth0, AWS Cognito, and Microsoft Azure AD.
It's best practice to have your authentication servers mapped to your brand's domains where possible, regardless of where the servers are hosted. This adds a level of trust when the users go through your authentication flow.
When you're ready, use the authentication testing tool under the "Test" tab on your service's dashboard to ensure your authentication flow is working properly.
Triggers
Triggers are what initiate an Applet. It is best to think of triggers as events that are valuable to your users.
For example, if your product is a smart light bulb, logical triggers would be events when the light is turned on or off. For a social media service, potential trigger events might include new content from a creator or a new follower on your channel.
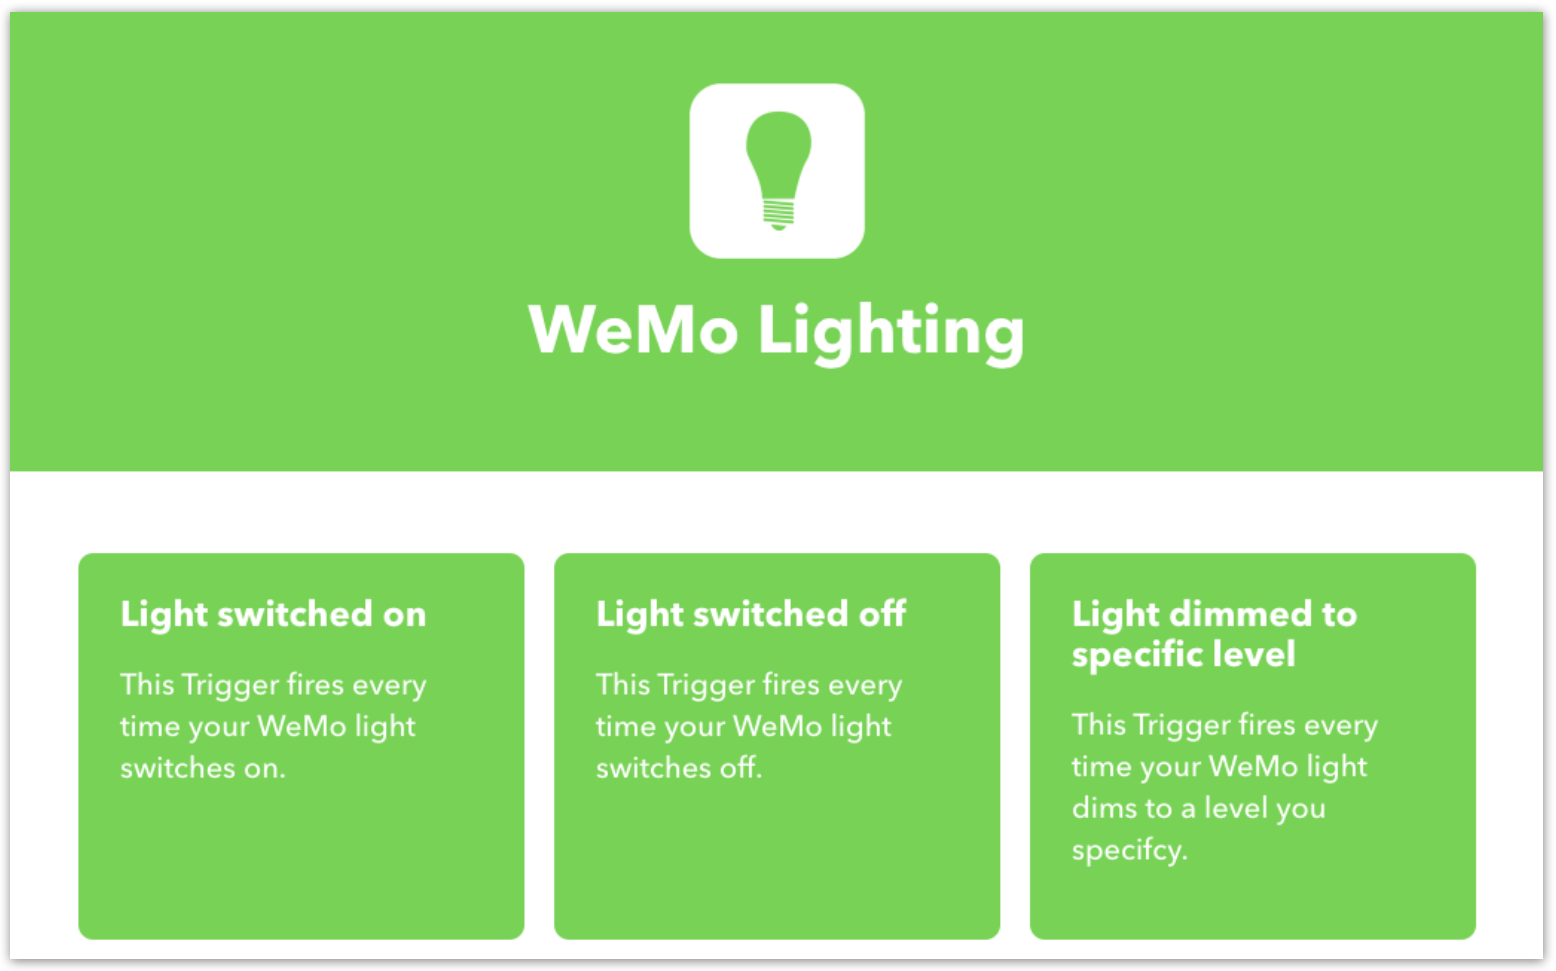
For products that have a data output, such as the value of a temperature sensor or a thermostat's current operating mode, it's a bit more challenging to define what constitutes an event.
In these cases, value-based triggers are implemented in such a way that the events represent a change in data.
Here are some examples of value-based triggers:
- The price of a stock rises above
{{PriceThreshold}} - Current AC mode changes to
Standby - Temperature drops below
{{TemperatureThreshold}}
You can implement a trigger that provides a new event on any change of data. However, it is more common to have some sort of logic, such as a threshold the value must cross to create the event, built into the trigger.
Trigger fields
While some triggers can send events without any additional information (e.g. Send IFTTT any email), most require additional context. This context is obtained via trigger fields that the user fills in when enabling or creating their Applet.
For example, a weather trigger that returns events for when the outside temperature drops below a threshold needs at least two trigger fields.
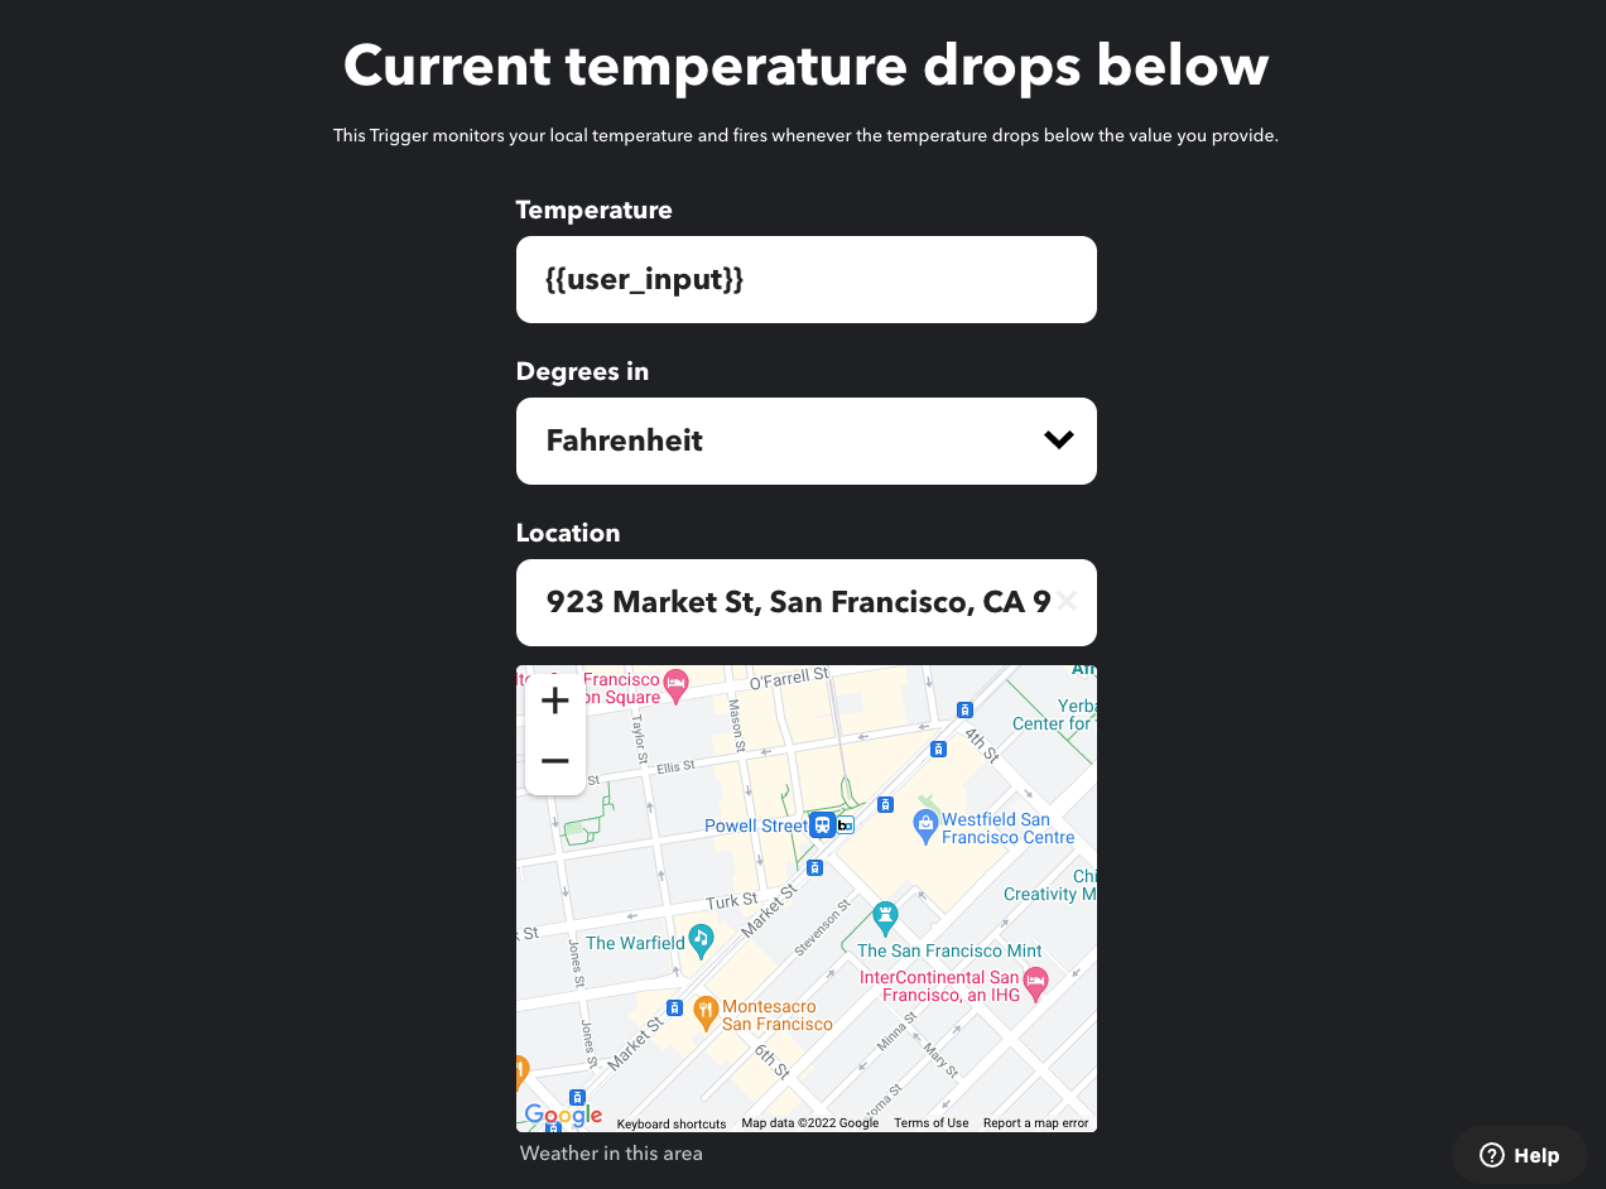
The first field asks the user to provide a location and the second field determines what the temperature threshold will be. This trigger may even need a third field for the temperature unit depending on the implementation, as it's possible that the weather service can infer the unit from the user's weather account's settings.
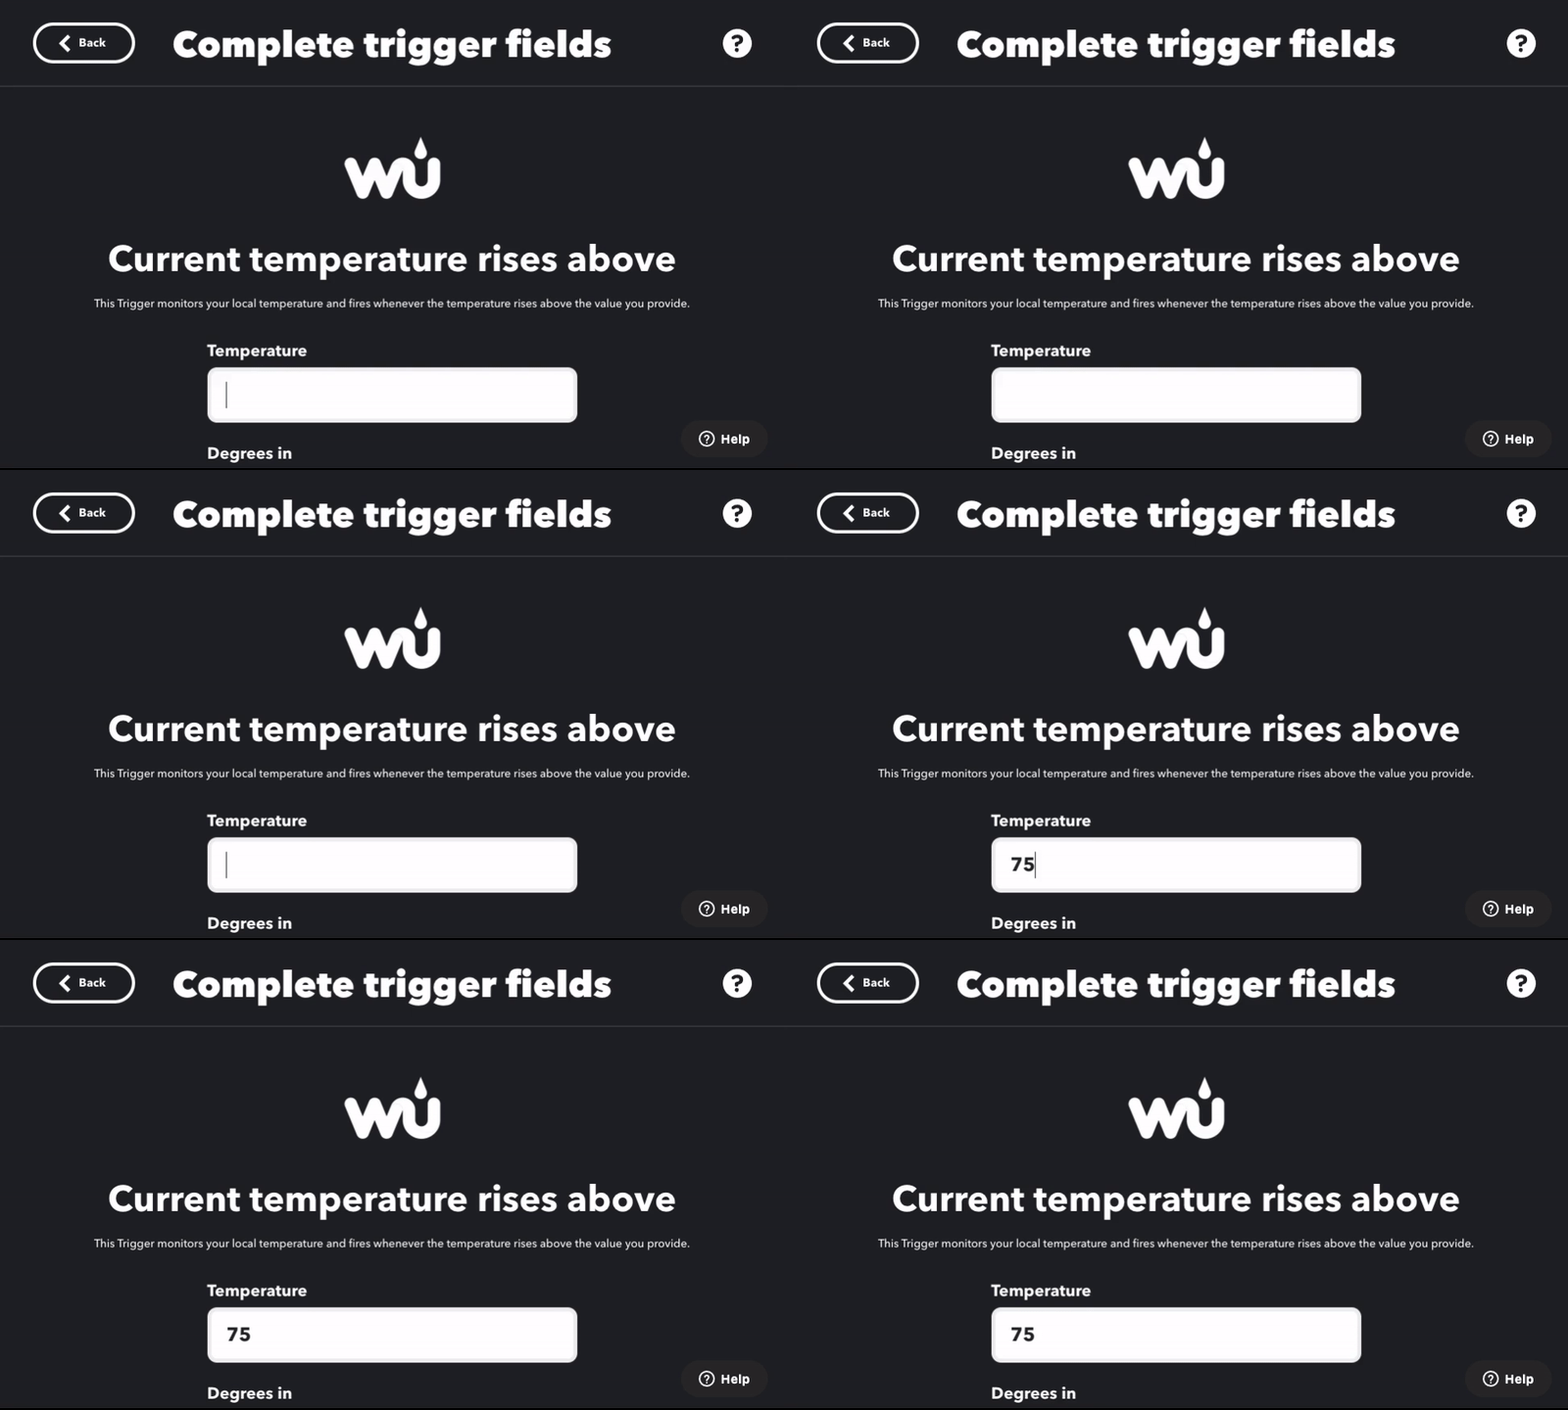
The most simple trigger fields are strings that the user can provide, such as a temperature threshold or a hashtag to watch. Both are text fields using strings.
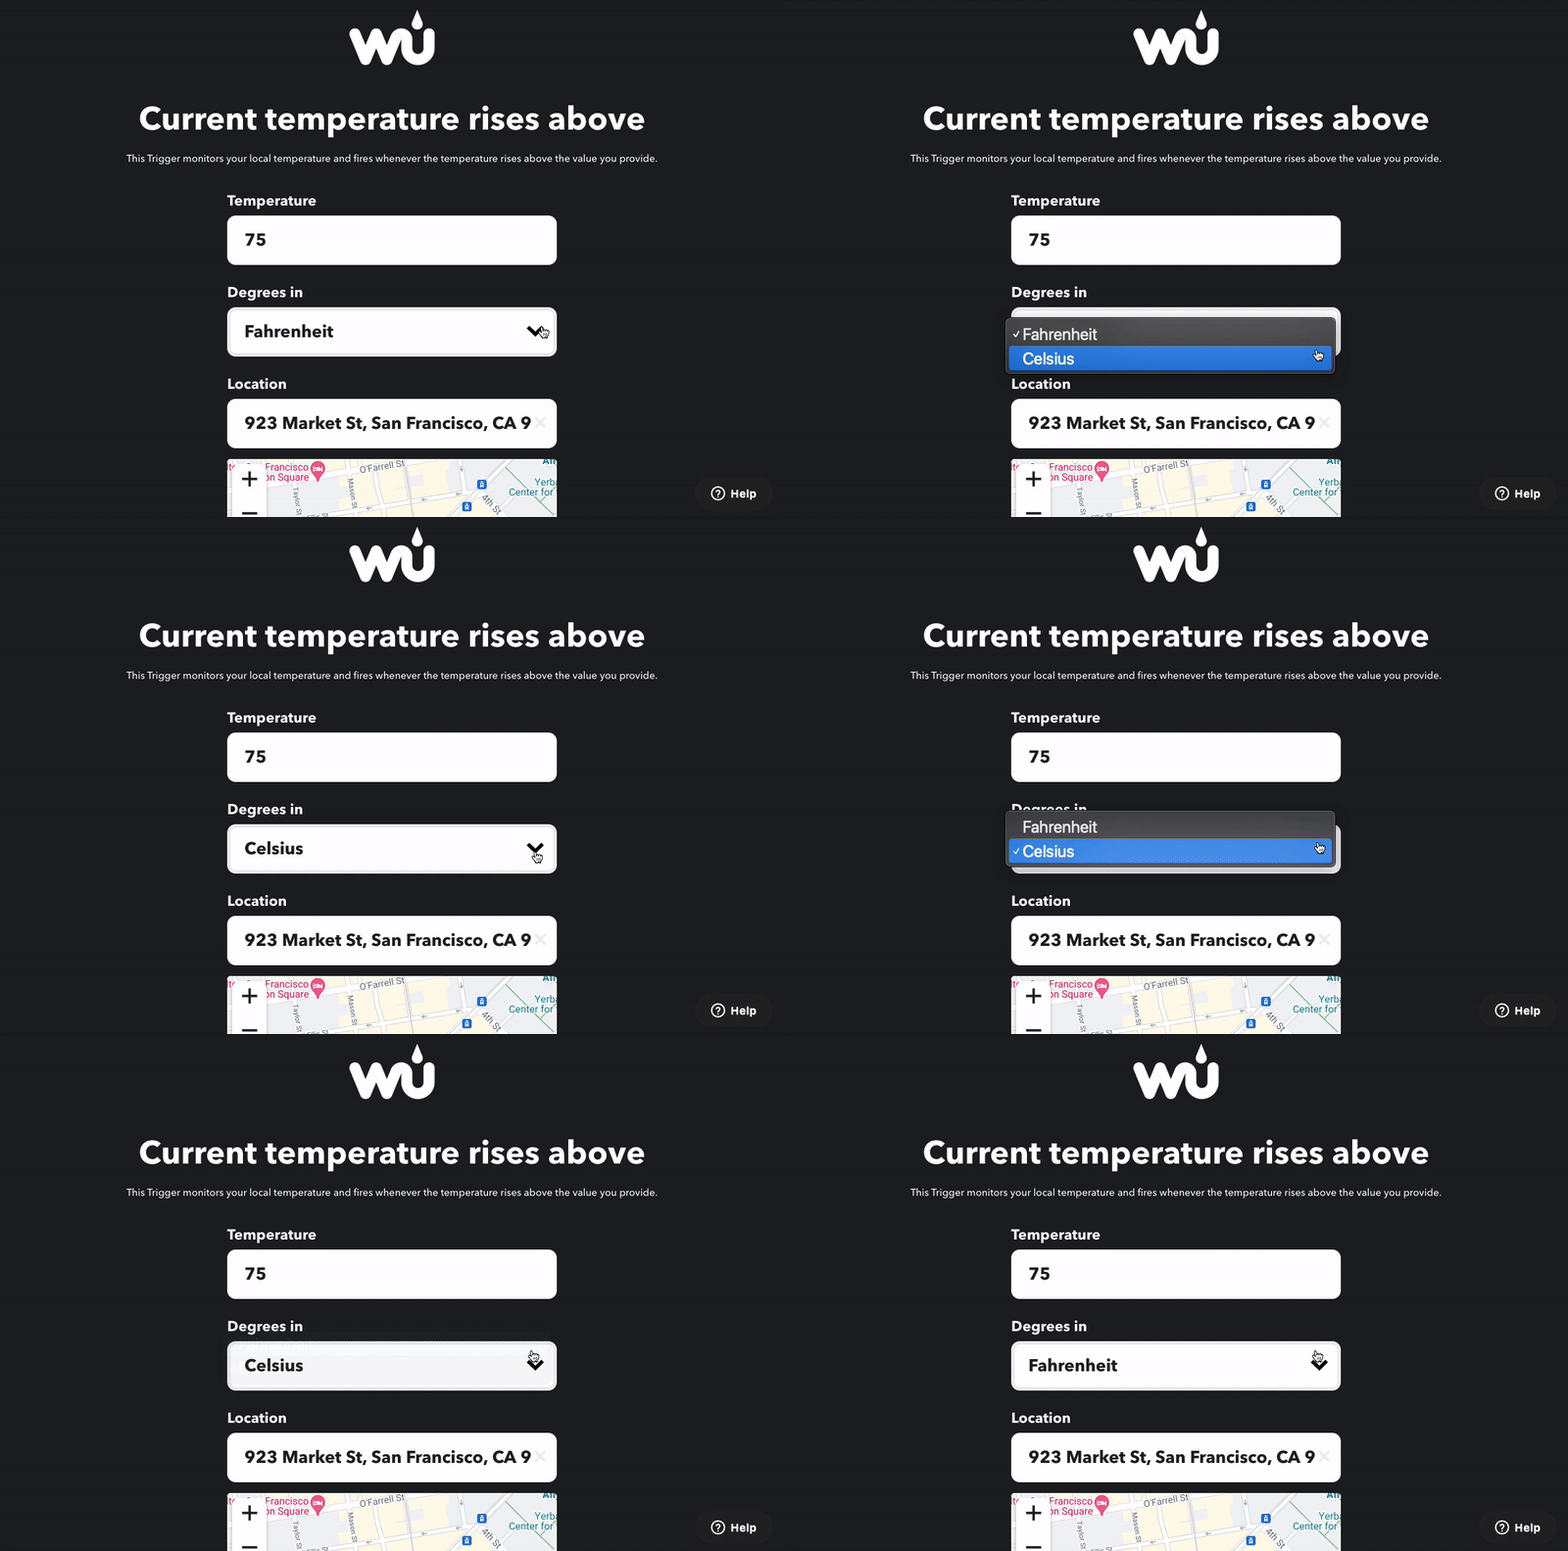
You can also include a static dropdown list to allow a user to select from a set number of values or options. Temperature units are commonly selected with a static dropdown.
Location-based fields provide inputs where the user can select a point on the map or manually enter an address.
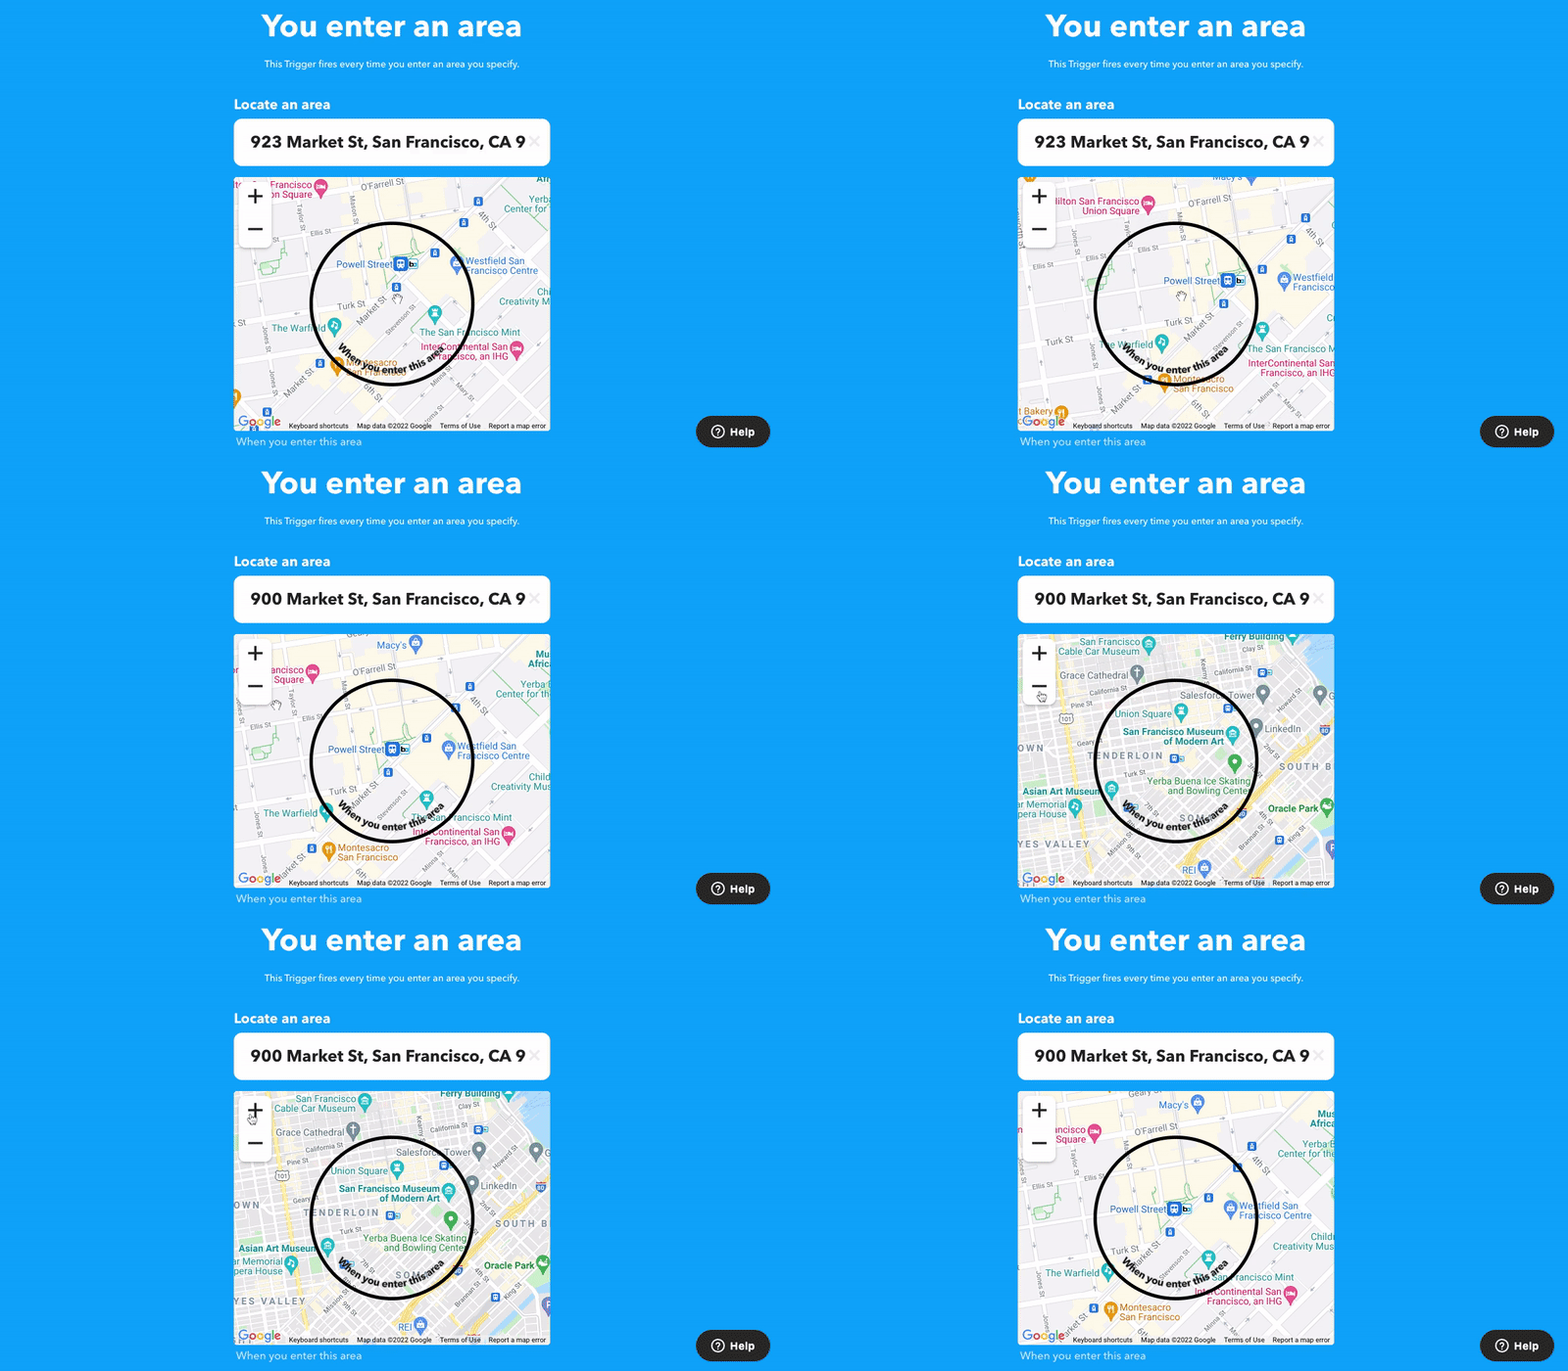
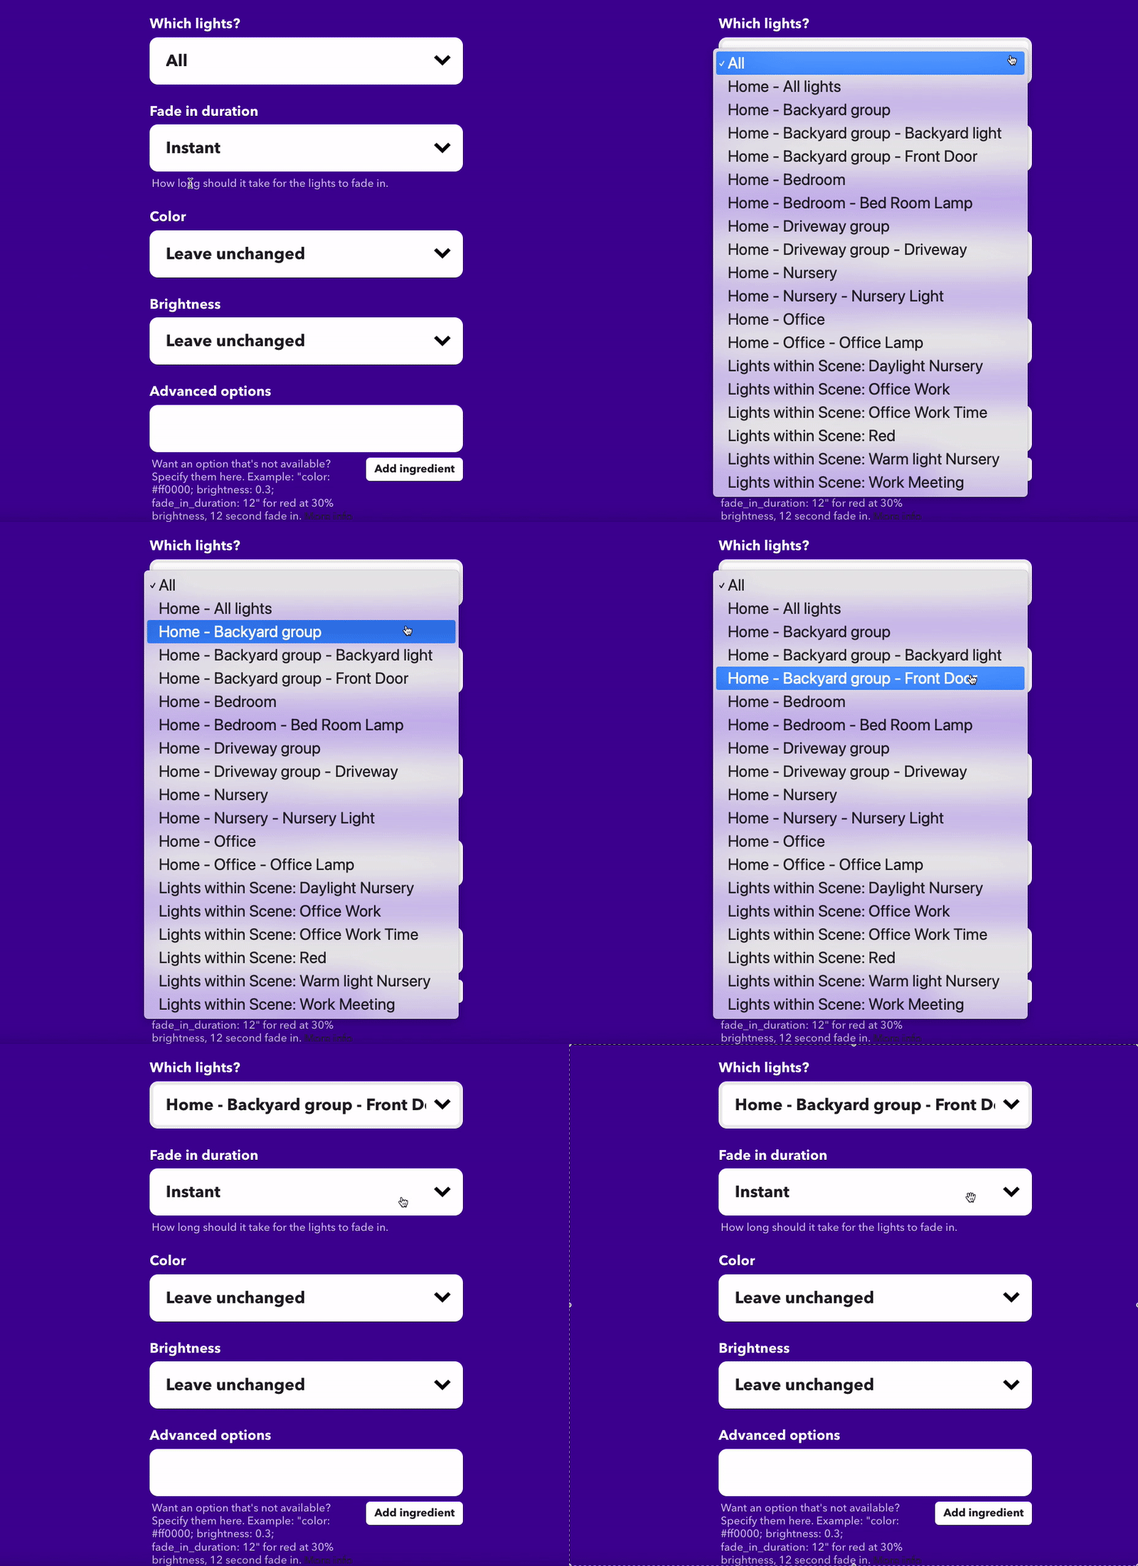
Dynamic fields such as dropdowns and checkboxes can show the user options that are available in the current context. Dynamic fields rely on dedicated API endpoints from your service to fetch the options available to the user.
The most common example of a dynamic field is a dropdown with a list of available devices in a user's account. For a smart light trigger, this method allows the user to specify which of their lights they'd like to control. For a communication app, it allows the user to pick from a list of their chats.
IFTTT allows different validation strategies to be used with trigger fields to ensure correct values are being passed. These range from simple regex matching to contextual and dynamic validations performed with your API.
Ingredients
Ingredients are data points returned by your API with each trigger event. Each trigger is required to have at least one ingredient. You can approach ingredients by asking yourself what the user and the Applet might want to know about a new trigger event.
If the trigger is for a new post or blog, the ingredients may include the title, content body, author, time of publication, category, or tags. In a trigger from a smart device, ingredients may be the time of the event, event type, or other additional data points (e.g. light color).
It's important to consider adding ingredients that mirror your trigger field values so that users can use those values in their Applets. Let's look at an example of a temperature sensor. The user might be asked to pick a sensor from a dynamic dropdown and set the temperature threshold to monitor in the trigger fields.
If a user builds an Applet to notify them when the temperature drops below a threshold value, only the trigger field will be able to be returned in the notification. By adding ingredients, more information like device details and real-time temperature will be added to the notification.
Actions
An action is something that happens as a result of an Applet running due to a new trigger event. Actions are the most intuitive and important components of services on IFTTT.
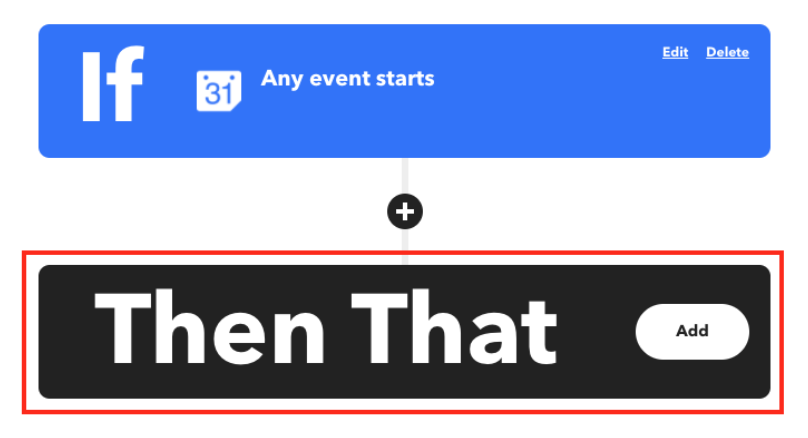
Turning on a light, publishing a new post, and starting a cleaning program are all examples of common actions.
An Applet can include multiple actions from different services or even use the same action multiple times.
Action fields
Action fields provide the "payload" for the action to run with. These can be static strings such as the content for a post, or dynamic events that are provided when the Applet is created.
Ingredients from an Applet's trigger and queries can be included in the action fields via placeholders. For example, a push notification action field can display content formatted as:
Sensor {{sensorName}} detects temperature below {{tempThreshold}} at {{createdAt}}. Current temperature is {{tempCurrent}}.
Placeholders inside {{ }} will be replaced with relevant trigger ingredients when the Applet runs.
Queries
If triggers represent a timeline of events, queries can best be described as the current state or history of an event.
Queries are used in Applets to provide extra context to the Applet and inform the actions along with the trigger data.
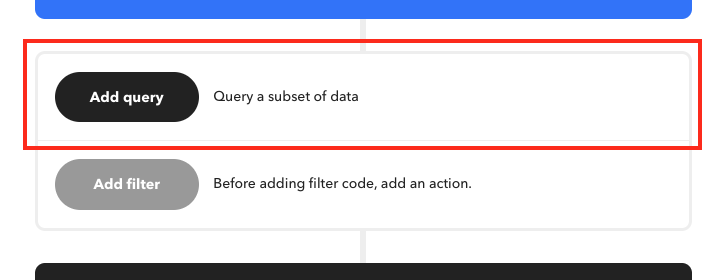
A good rule of thumb is to have a corresponding query for each trigger. For a trigger such as "Light is turned on," a complementing query could be "Is the light on or off right now?". The "Calendar event starts" trigger can be translated into a "List calendar events for the day" query.
Stock prices, current weather, garage door state (i.e. open or closed), and recently played videos are all useful queries to improve Applets.
Query fields and ingredients
For the most part, the same rules apply here as with trigger fields. One notable exception is that trigger ingredients can be included in query fields. Therefore, it's not always possible to validate query fields because unexpected data from the trigger can cause the query to fail.
How to design successful Applets
Applets are automations that users can create or enable to connect your IFTTT service to one or many other services. For example, an Applet can turn on your lights automatically at sunset, or create events in your iOS Calendar via Google Assistant.
Users can create their own Applets or enable published automations. To create an Applet, think of a use case that your users would find valuable. Often, this would be something they can't do without connecting to another service. If your service is already live, the analytics tab on your Platform account can provide great insights on how users are building with your service and what other services they're connecting to. Publishing Applets with popular services, services in the same category as popular services, or with new services are all great ways to increase engagement.
Once you've got some use cases in mind, head to ifttt.com/developer_dashboard and navigate to the Applets tab. To create an Applet for users, press "New Applet" on the top right of the Applets tab.
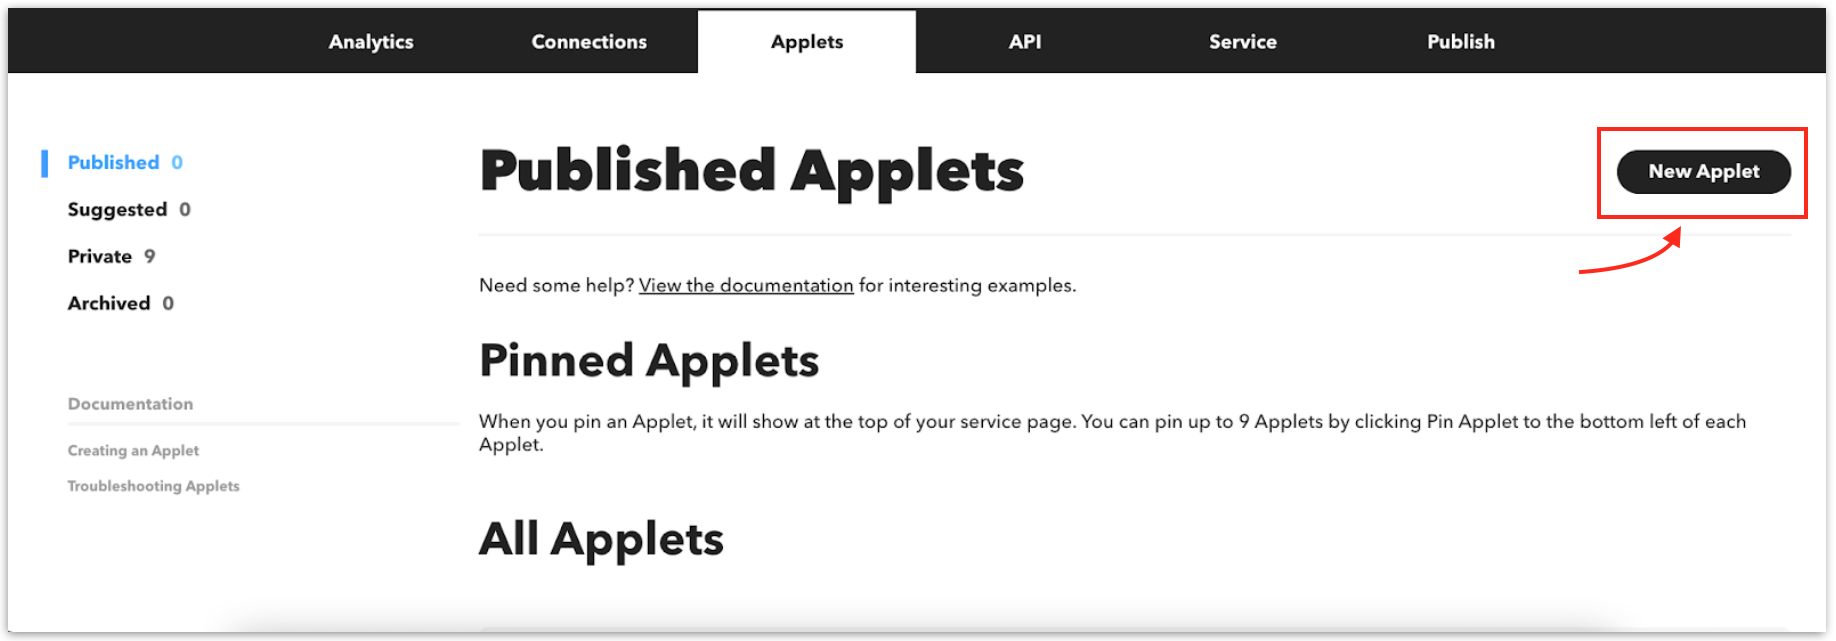
As an example, let's walk through creating an Applet that automatically turns a user's LIFX light on whenever they enter a certain location. Note: For your Applets, you'll want to use at least one trigger, query, or action from your service.
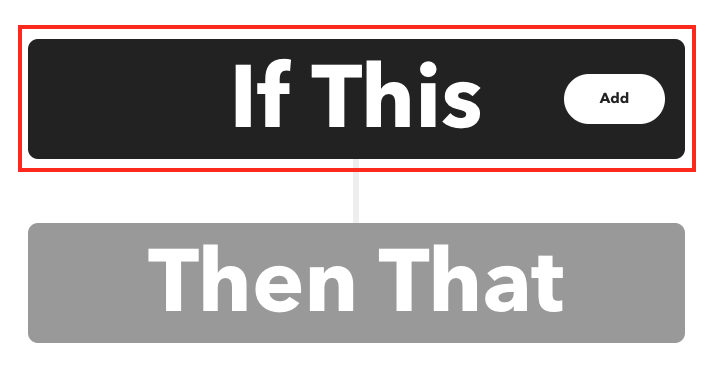
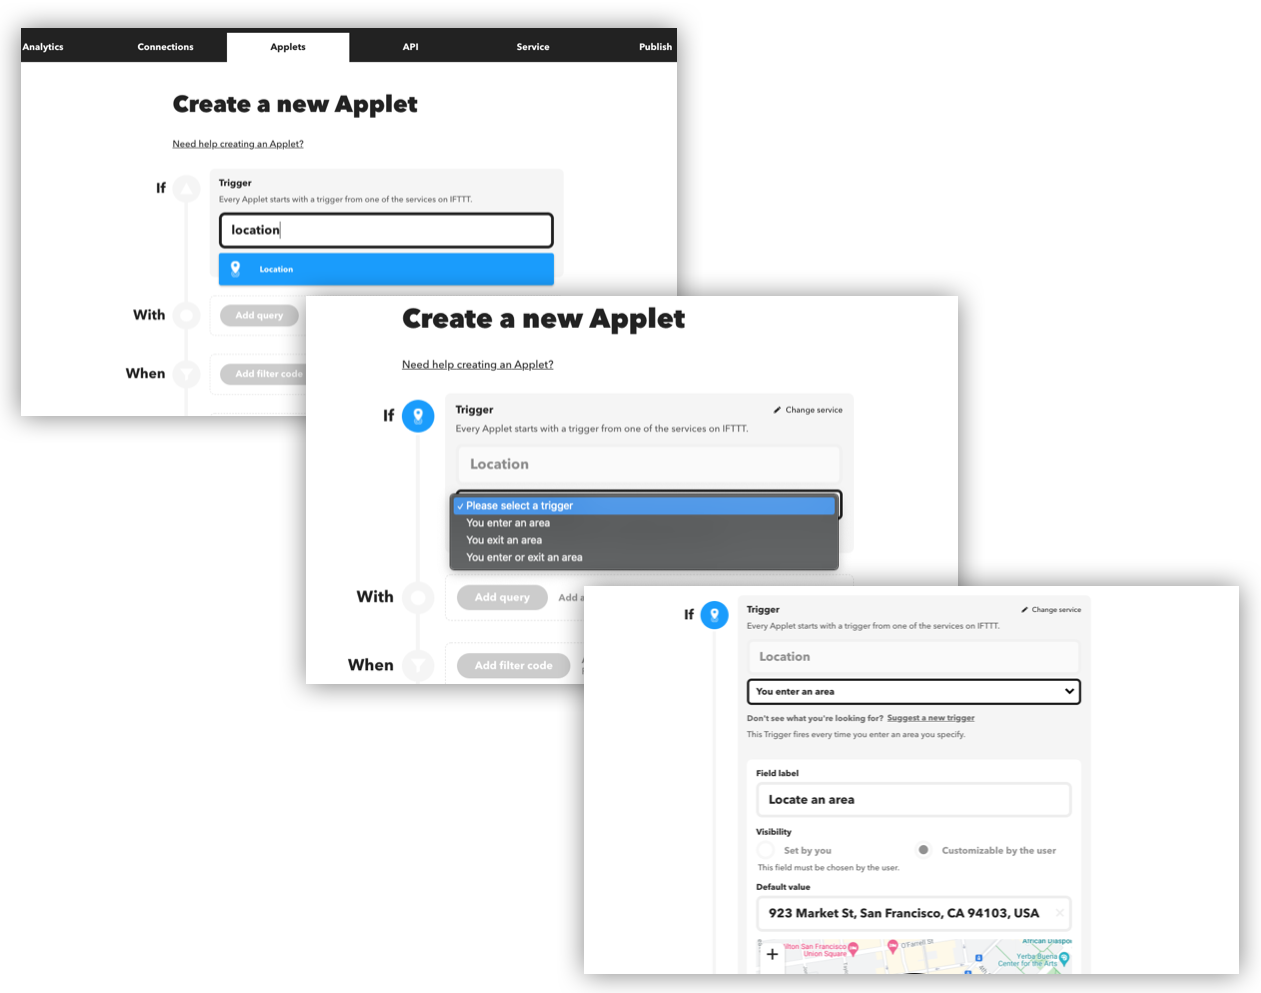
The first step is to select a trigger service. The trigger is the "If" portion of the If This Then That statement. In this case, we'll use the Location service.
After selecting a trigger service, a dropdown will appear with that service's triggers. This Applet will use the "You enter an area" trigger. Once the trigger has been selected, we'll be presented with trigger fields that can be set by us or customized by the user. We want this Applet to run based on a location set by the user, so we'll leave these fields as "customizable by the user."
Now that our trigger is set up, it's time to add an action. The action is the "That" portion of the If This Then That statement. In this case, we'll use the LIFX service.
Click the "Add Action" button, and as before, search for the action service. Once we select the LIFX service, a dropdown will appear with its various actions. Select the "Turn Lights On" action. Again, we'll let the user customize which bulbs they'd like to turn on under the "Which lights" action field.
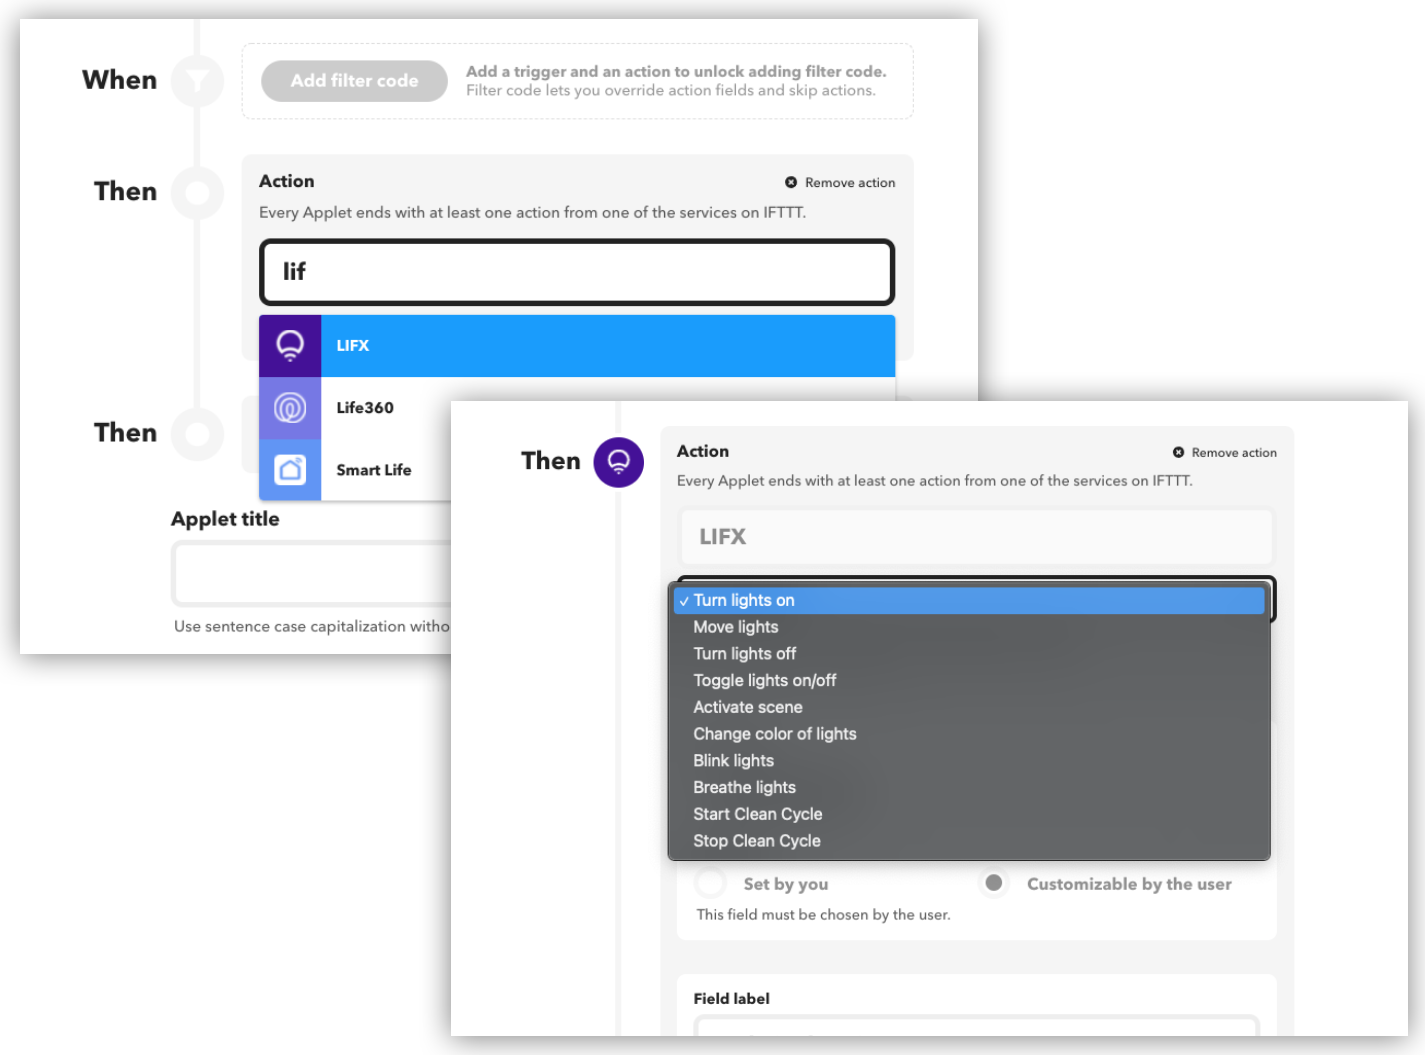
Our Applet so far only includes one trigger and one action. To create a more advanced Applet, we can include multiple actions, use queries, or add filter code to skip actions.
Read more on the use of filter code and queries in Applets.
The final step to building an Applet is to give it a title and a description. The title enables users to quickly understand what the Applet does. The description helps users understand the details and value of your Applet. Additionally, the description can be used to inform users of any additional steps or tips on how to best configure the Applet. Note that the Applet title will be a part of the URL for your Applet. Both the title and the description will be indexed and contribute to the SEO on the Applet page. Choose a logical and intuitive name with vocabulary that will be familiar to your users to make it easy for them to discover and understand its purpose.
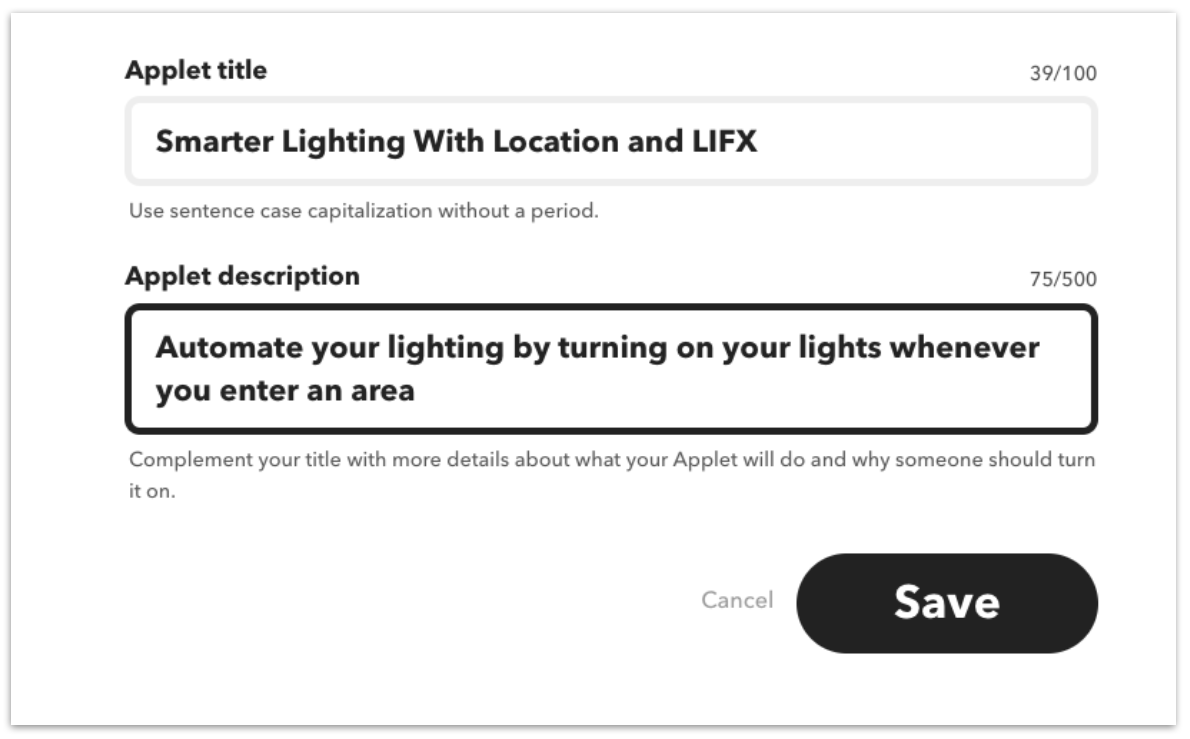
Finally, click "Save." The Applet will now be listed under your private Applets tab.
Recommended settings for fields
As you create Applets, you may find certain trigger, query, and action fields present a visibility option. This gives you the option to choose whether a user can edit a field or if it should be predetermined.
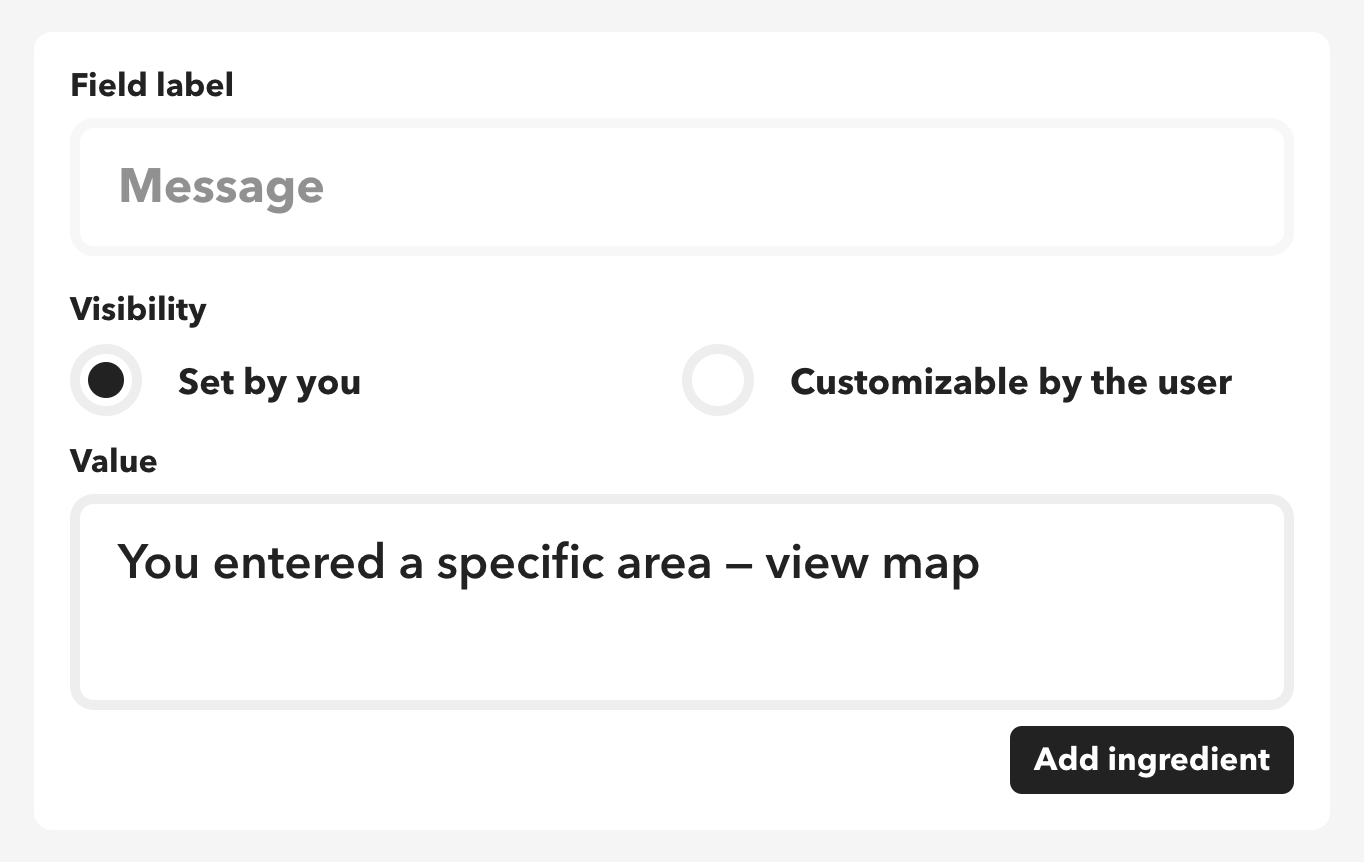
If you choose "set by you" the user will not see nor be able to configure the field when enabling your Applet. Instead, the field will default to the value you select. If a field should always be constant for your use case, then it's best to set the visibility to "set by you".
Alternatively, giving users the flexibility to customize a field opens up new possibilities for ways they can use the Applet.
Testing your service using Applets
Applets you create on the Platform aren't immediately available to users until you publish them. Before publishing an Applet, it's important to test them to make sure they work as expected. This is especially important for Applets that include filter code.
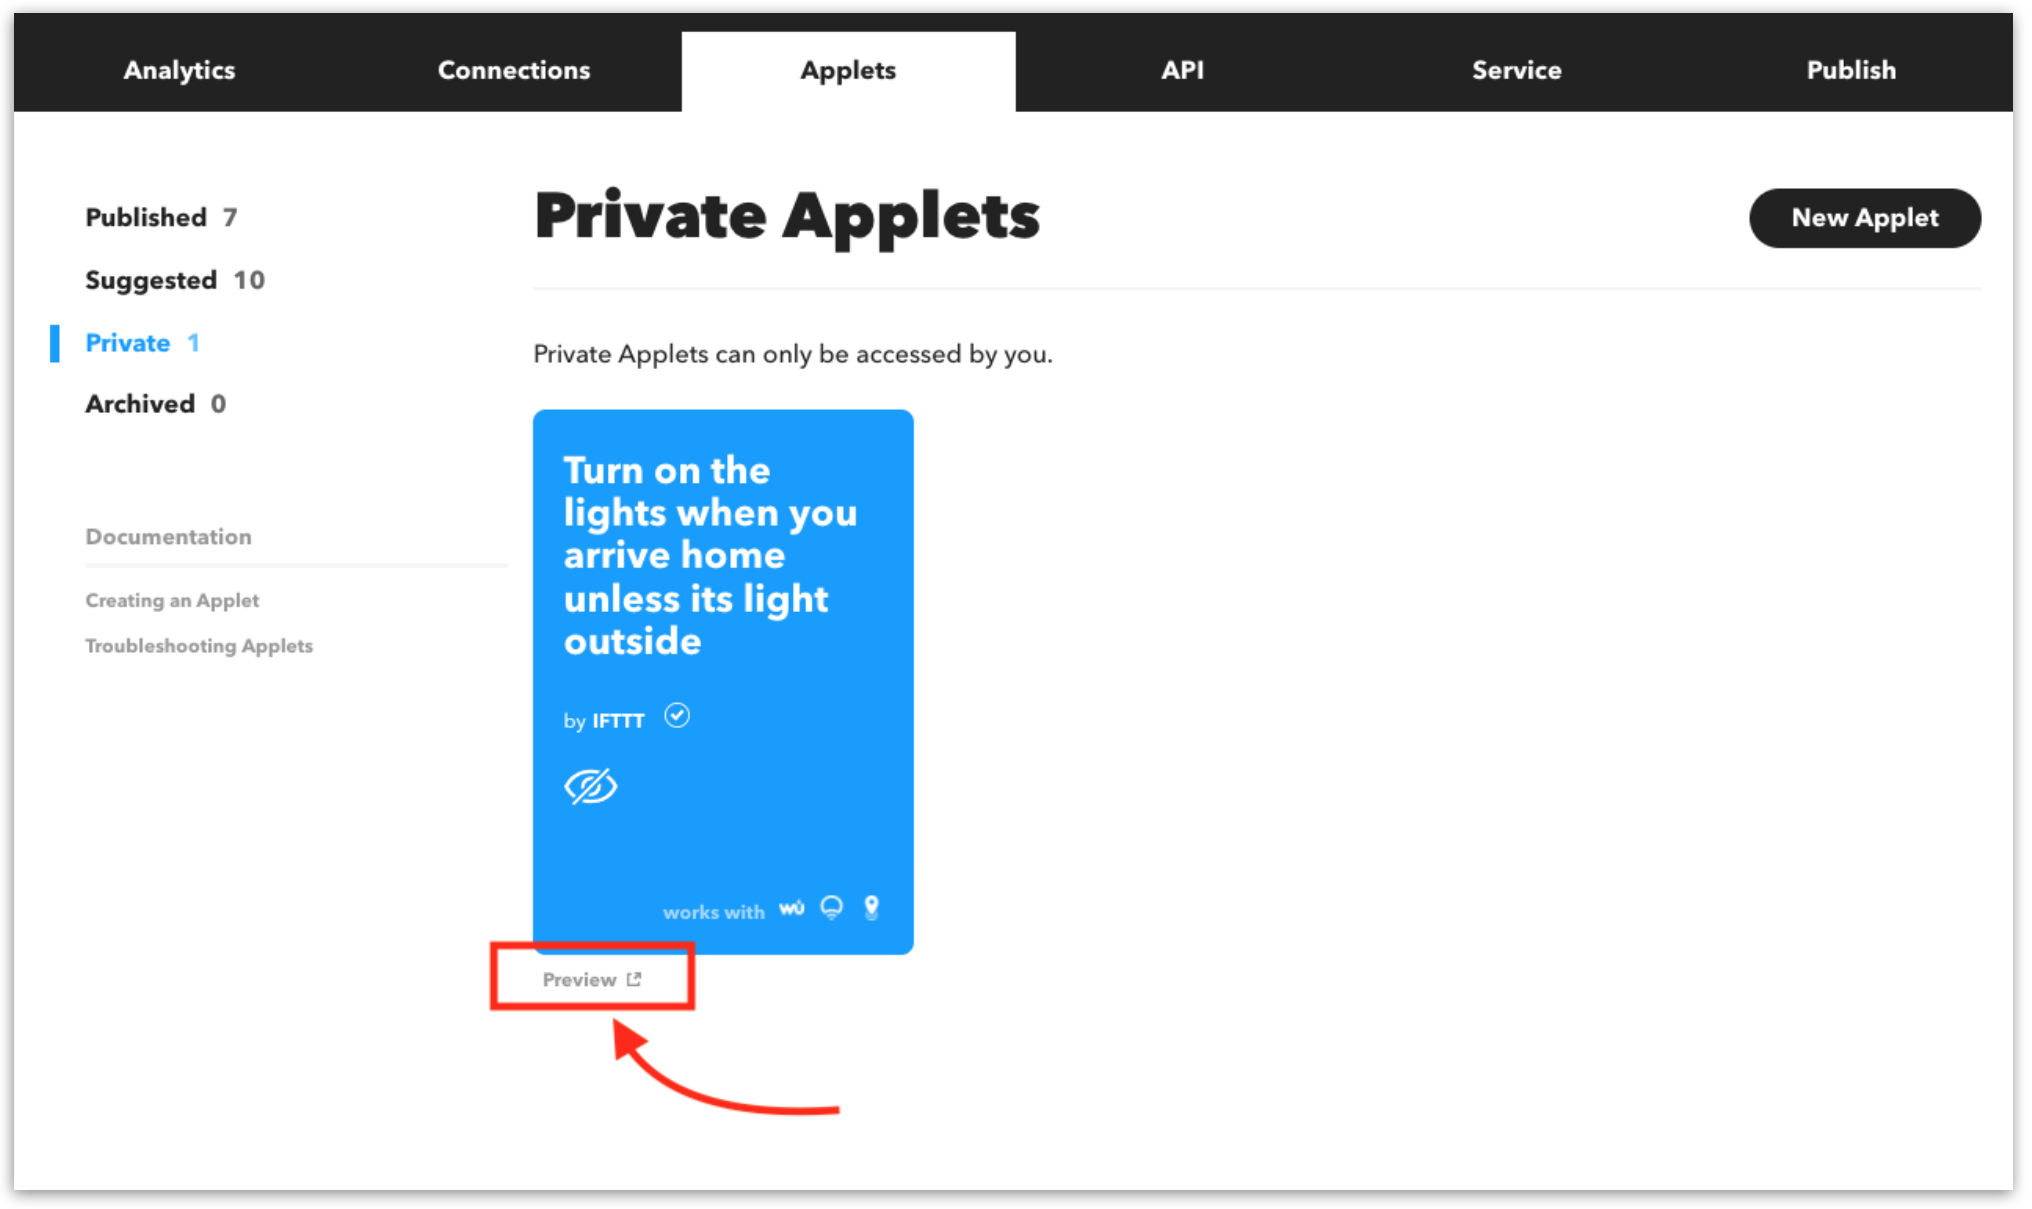
You can enable Applets in the Private tab of your Platform account. Simply click on the Applet, then press the "Preview" link.
Publishing and promoting Applets
The next step is to publish and promote your Applets. Publishing an Applet makes it visible on your service page, discoverable in the Explore page, and readily available for any IFTTT user to enable.
Social media content, videos, and email campaigns are all great ways to promote your newly published Applets. Be sure to tag IFTTT's social media accounts in your posts so we can amplify the reach of your published Applets.
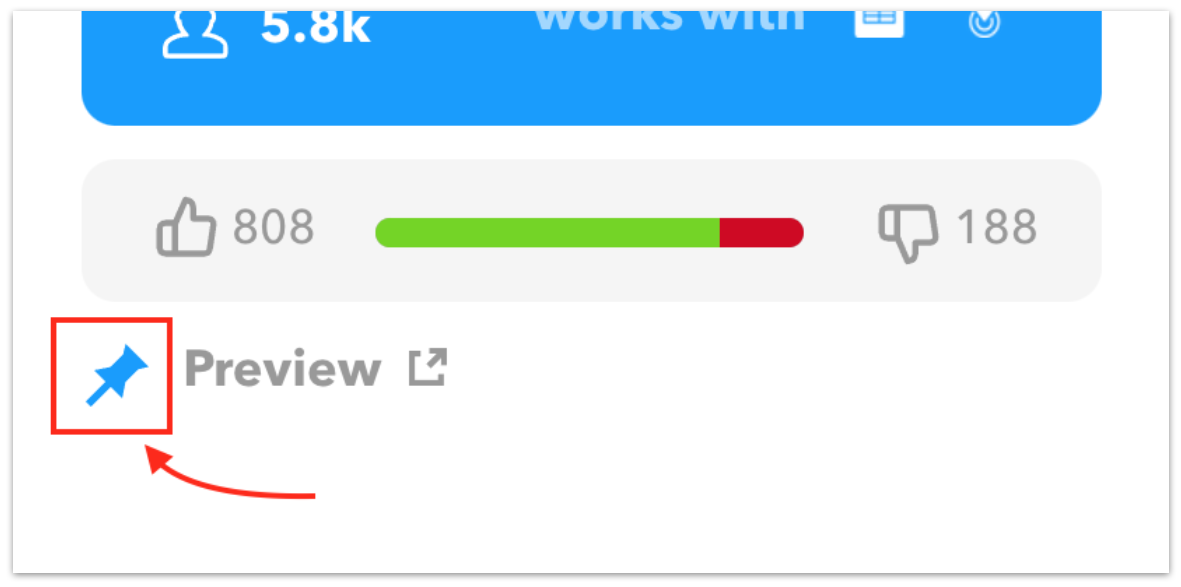
To display your published Applets front and center to users, pin them to the top of your service page. To pin an Applet, navigate to your "Applets" tab on the Platform, then press the "pin" icon on the bottom left of your Applet.
You will need to have at least twelve Applets published when launching your IFTTT service. But don't stop there - you can publish Applets at any time! Services that frequently publish and promote new Applets typically have the highest levels of user engagement.
How to brand your IFTTT service
Your brand will be displayed on IFTTT for millions of users to discover and incorporate into their Applet automations. There are a few ways for users to find and connect your service on IFTTT, so ensuring branding consistency across them is key to your success.
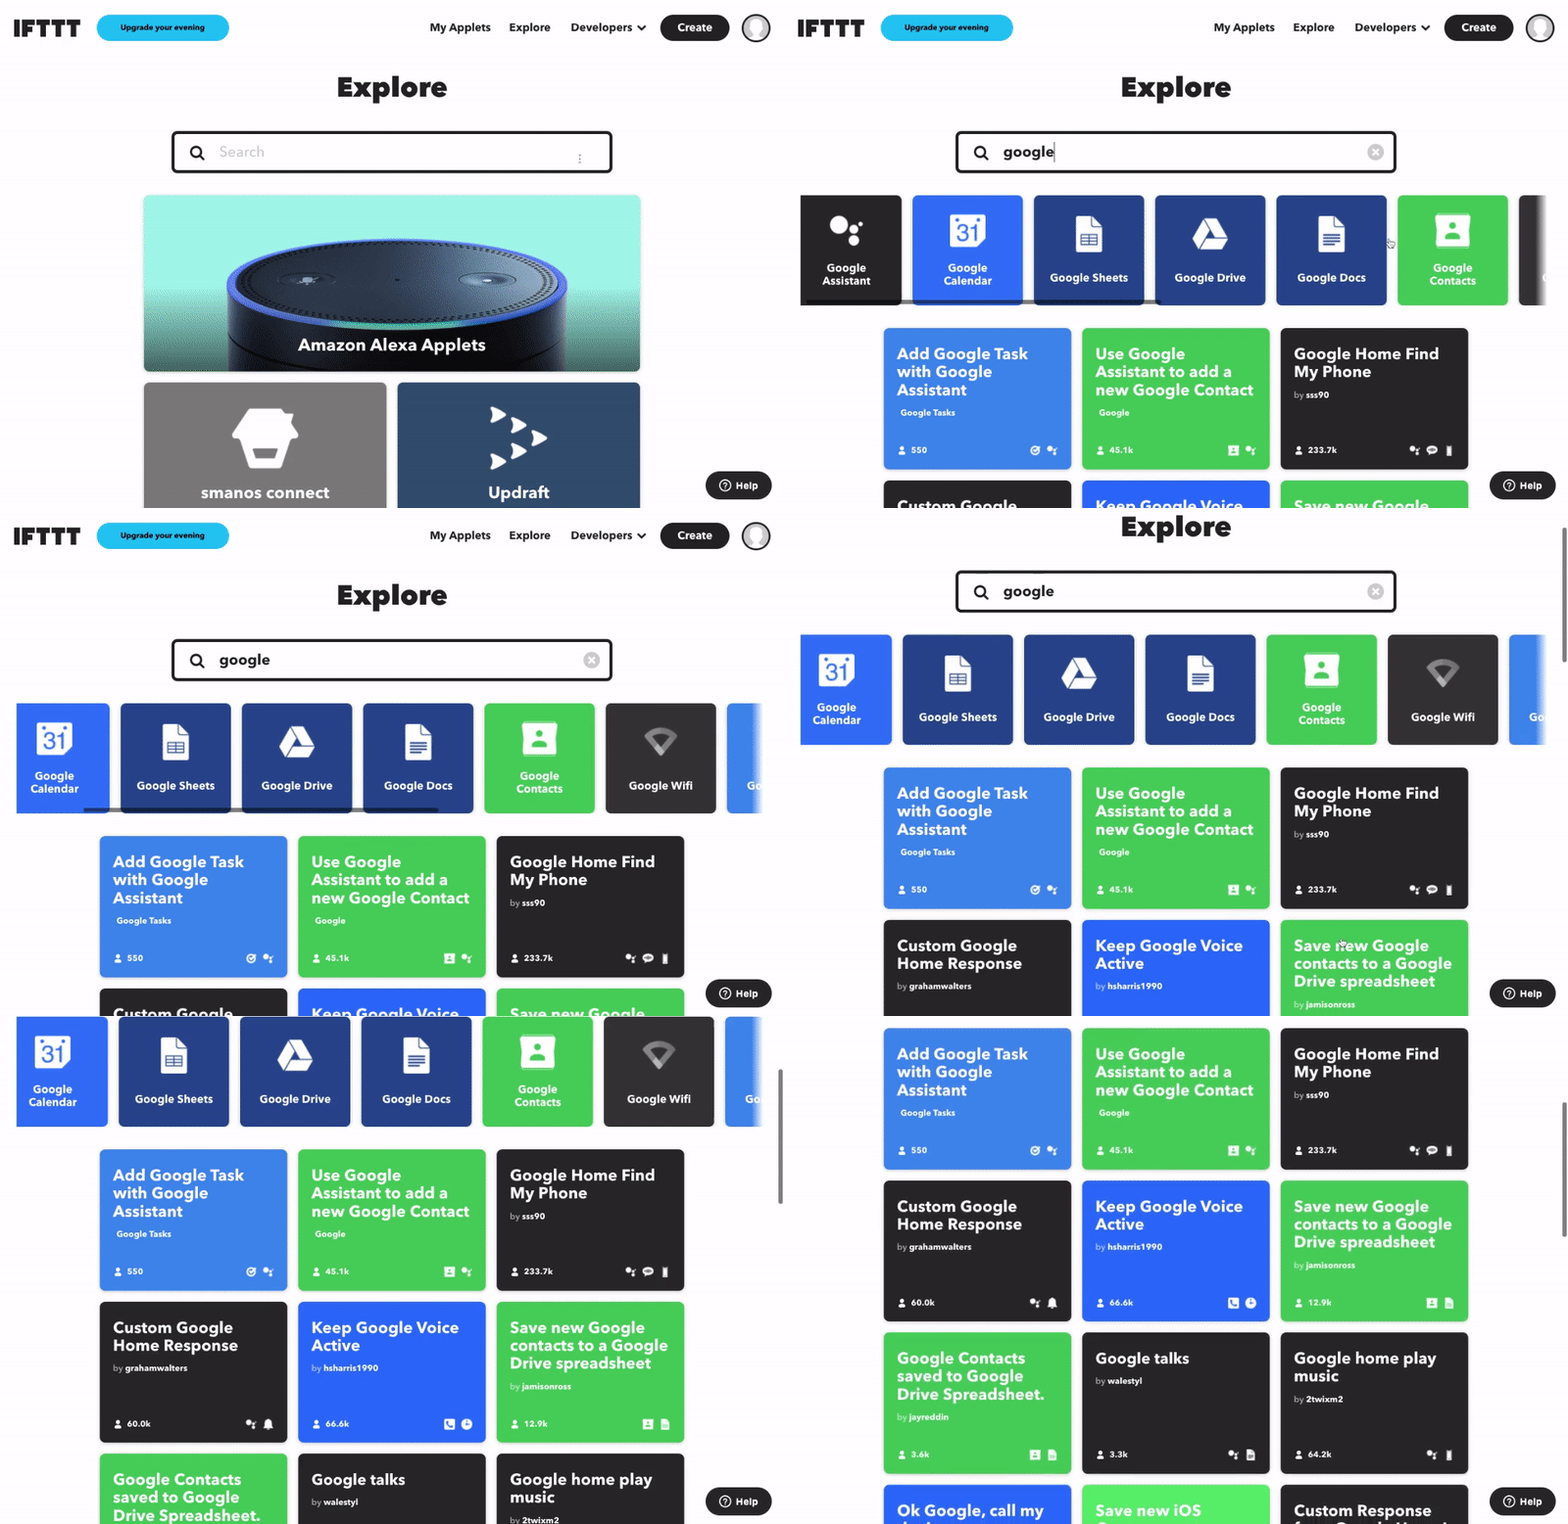
For most IFTTT users, the search for new services and Applets is done primarily through the IFTTT Explore and Search pages. Users can easily filter through these pages with the provided search bars.
Every IFTTT service then has its own dedicated service page with your unique branding. This is often the first place users will engage with your brand on IFTTT for the first time. Your service page will display details on your integration's purpose and highlight how your service can work together with other popular services on IFTTT.
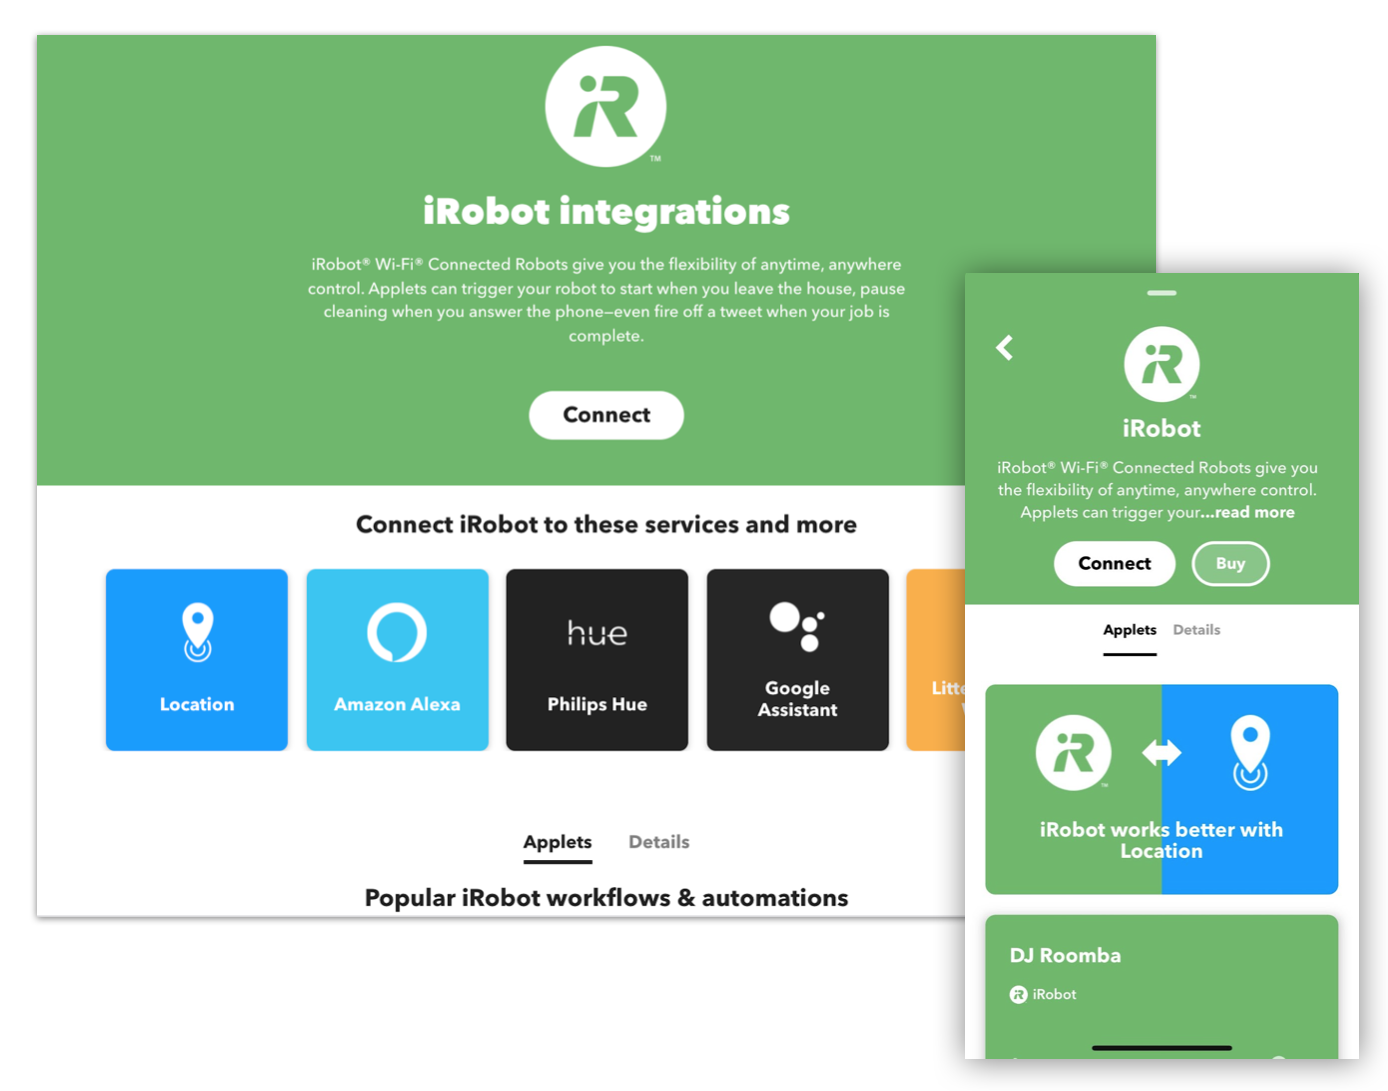
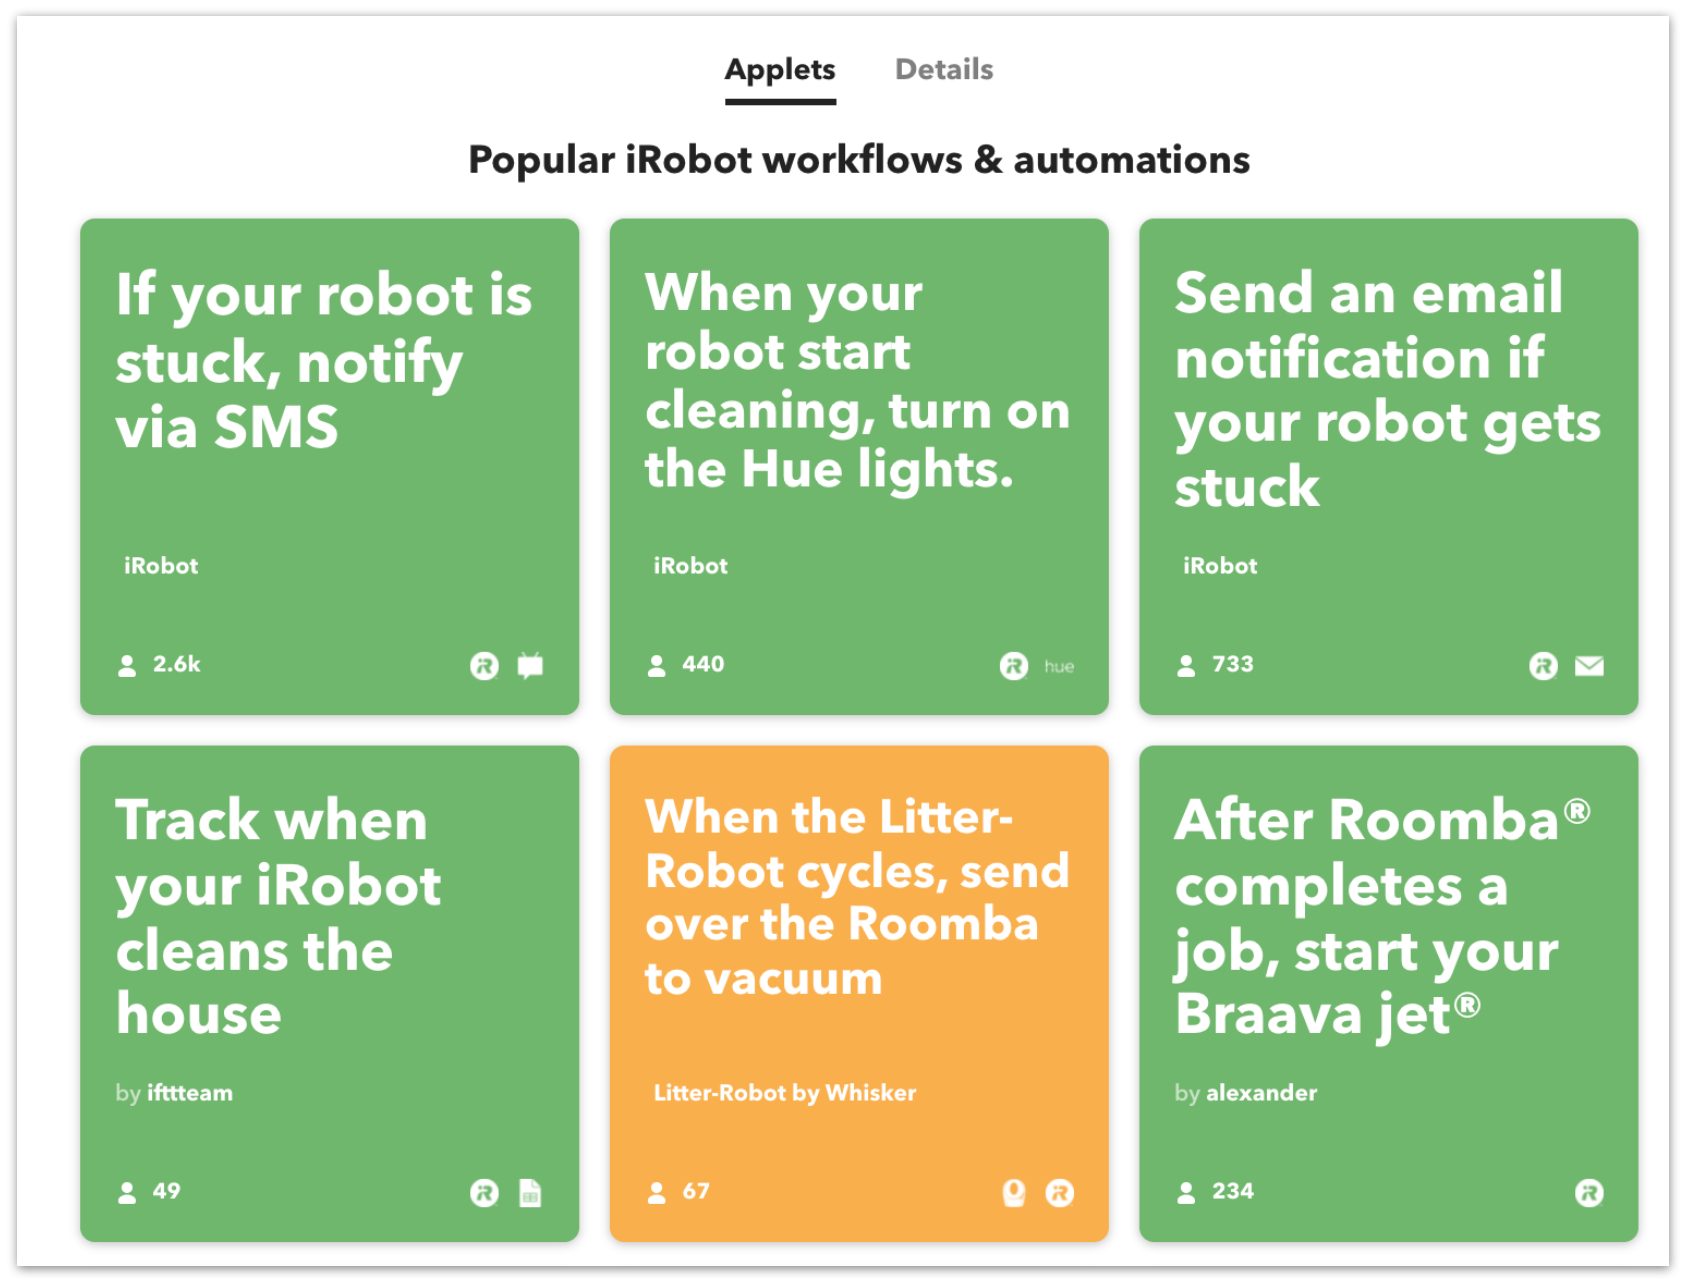
Service pages also include a sample list of Applets, predefined examples of popular automation use cases for your service that users can enable in just a few clicks. Applets in this list include those that are published by you, other services, and users.
Your service page is where your branding will shine the brightest. While setting up your service, we will prompt you to add a service name, logo, description, category, and brand colors.
Service name
Your service name should be identical to your product's name, using the same capitalization and spacing that your company uses so that it is easily recognizable to users.
Pro tip: Avoid adding adjectives or phrases, but include your company name if the company and service name are always used together in your branding. You don't need to include "app" or "service" unless you always include that in your product's branding.
Example:
SmartHours, notSmartHours Energy Saver Service, notSmart HoursGoogle Sheets, notSheetsorGoogle Spreadsheets
Applet logo
The Applet logo is a simplified version of your logo that will be placed over your brand color. The Applet logo is featured on your service page and Applets.
Requirements: Upload an SVG file of your Applet logo. Your Applet logo should be exactly 620x620px in size, have a transparent background, and most importantly only contain the color white so it can be rendered on both light and dark backgrounds. Your Applet logo should be a vector image without an embedded raster image so it can be scaled correctly.
Example:

Service description
Write a brief description (2-3 sentences) of your service's core features and use cases. Include your service's name in the description and state the integration's purpose. It's helpful to use proper grammar and full sentences. IFTTT has millions of global users and this allows non-native English speakers to translate the description to their native language.
We also allow non-English descriptions if your service's primary audience is region-specific. However, we recommend that non-English descriptions are supplemented with a brief English version so that users can see if your service is available in their market.
Pro tip: Use simple and direct language. We advise against using "IFTTT" or other service names in the description. Our most successful service's have descriptions that are 25-50 words and are 2 sentences in length.
Examples:
Dropbox lets people bring their documents, photos, and videos everywhere and share them easily.., notDropbox is the world's best document storage repository.The Honeywell Home family of smart products includes thermostats (like the T-Series and Round), awareness (like Smart Home Security), and water leak detection.., notA Home Automation Hub.
Service category
Choose a category from the options we provide that best fits your service's core features and use case. If your service potentially matches multiple categories, choose the category that best describes what your service is most used and known for.
You may update your service's category at any time, allowing for flexibility to move into another top category as your product evolves.
Example:
- LinkedIn is a business-oriented social networking site where you can share the best content, automatically, with your professional network, so it fits best in the social network category like Facebook, not in the communications category with Slack.
Service color
Choose a color to represent your brand and product on IFTTT. This color will serve as the background color on your service page and Applets. Ask your marketing team for the 6-digit hex color code for your brand or product's primary color and enter it in the brand color field.
Avoid using white or really bright colors for your brand color, as overlaid text would be unreadable. If your logo is black and white, use the next most common color from your branding, e.g. gray. However, we also recommend choosing a color intensity that considers contrast for good visibility.
IFTTT will use the brand color you select to promote your service to users through the Explore page, your service page, IFTTT's marketing materials, and other parts of the IFTTT app.
Maintaining your IFTTT integration
Keeping tabs on the health of your service
It's important to keep an eye on the health of your service, especially during the first weeks after launch or a major update. When your service responds with errors, the users' Applets may not run as expected. Some issues are transient and IFTTT can recover by retrying. Persistent errors can result in Applets and services being disconnected.
IFTTT provides a health dashboard in the Analytics tab that shows the success rates across different types of requests. You can inspect the details for each error in the logs. The logs are available for the last 48 hours.
Pro tip: Use the health dashboard as a troubleshooting tool while developing the service and testing it prior to the launch.
Abnormalities, such as a sudden spike in error rates, will trigger email alerts sent to service admins. In some cases, IFTTT may automatically pause the service for a short time. A paused service will not receive trigger checks. We do this to avoid the accumulation of errors in users' Applets.
Providing support documentation
You should take advantage of the trigger, query, and action description fields, helper texts, and service description to provide users with helpful information and support documentation where possible.
If your service requires specific steps by the user, the description is a great place to include a link to an integration guide. Similarly, a link to a list of compatible devices in the dynamic dropdown's helper text can help users better understand how to troubleshoot. One of the most common support questions our team receives is why a user is not seeing a device under a certain action.
Though not required, you are encouraged to provide the IFTTT team with documentation that we can leverage when responding to user support requests related to your service. This can be as simple as providing the best ways to get in touch with you if a user encounters an issue or detailed troubleshooting steps we can provide for common issues.
Migrating to a new version of your service
Healthy and popular services are adding new features all the time. We are happy to support you in updating and improving your published service with no disruptions for existing users.
To make more substantial changes to your service, such as adding new actions or triggers, first clone your existing service, make any necessary changes or additions, and then submit that service for review. After the changes pass our team's review, they will be migrated to the existing published service with no impact on existing integrations and Applets.
Here are a few things to keep in mind when planning an update to your service:
- The cloned staging service will always have a unique service key that is different from the published one. The published service's key is never updated with the staging one. This means that your API must accept both keys for our tests to pass or the staging service must use a different (staging) version of your API.
- It's acceptable to submit a staging service for review if it's using a different version of your API URL. We will not update the published service's API when we migrate the changes.
- You should avoid introducing changes to existing triggers, queries, or actions. Where possible, a new trigger can add the missing functionality while the original trigger is maintained for backward compatibility. An example of a non-breaking change is a new trigger ingredient. This update can be applied to enabled Applets. A breaking change may be a new or updated trigger field. Such a change cannot be applied because it will leave enabled Applets with an incomplete or incorrect configuration that cannot be resolved without user input.
- If you want to submit the changes for review but do not want them to be migrated as soon as possible, please reach out to our Platform support team. We will be happy to coordinate a migration time that suits your team.
- It's possible to seamlessly update API URLs, authentication URLs, credentials, etc. For example, if you are moving your service to a new infrastructure with no breaking changes, submit a staging service for review with the updates and leave a note for our team on each change that needs to be applied.
- The Applets you build in a staging service cannot be migrated to the published service. Once your updates go live, you can build and publish new Applets for your new functionality in the original service.
Branding and other updates
You can make updates to your service's branding and settings at any time directly in the Platform.
If you need to update your brand's logo images or make copy changes to individual items such as trigger descriptions, please follow the process outlined above for submitting a staging service for review.